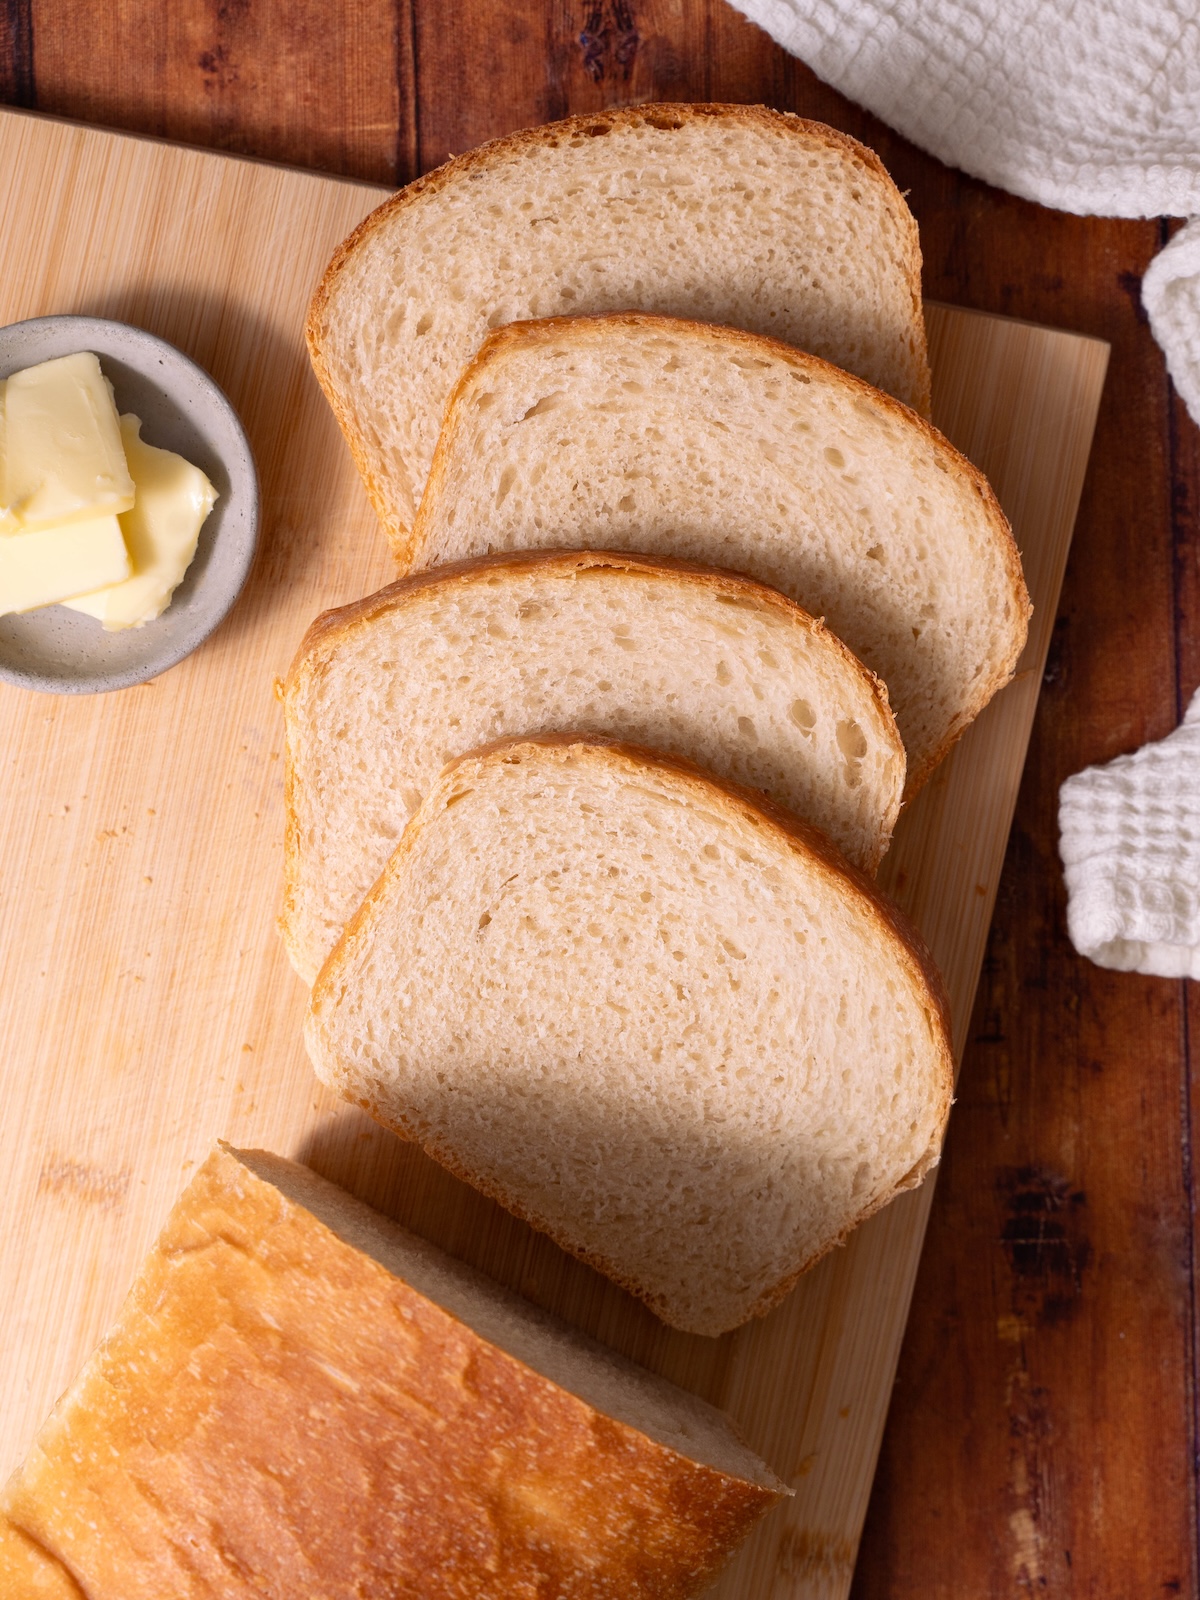
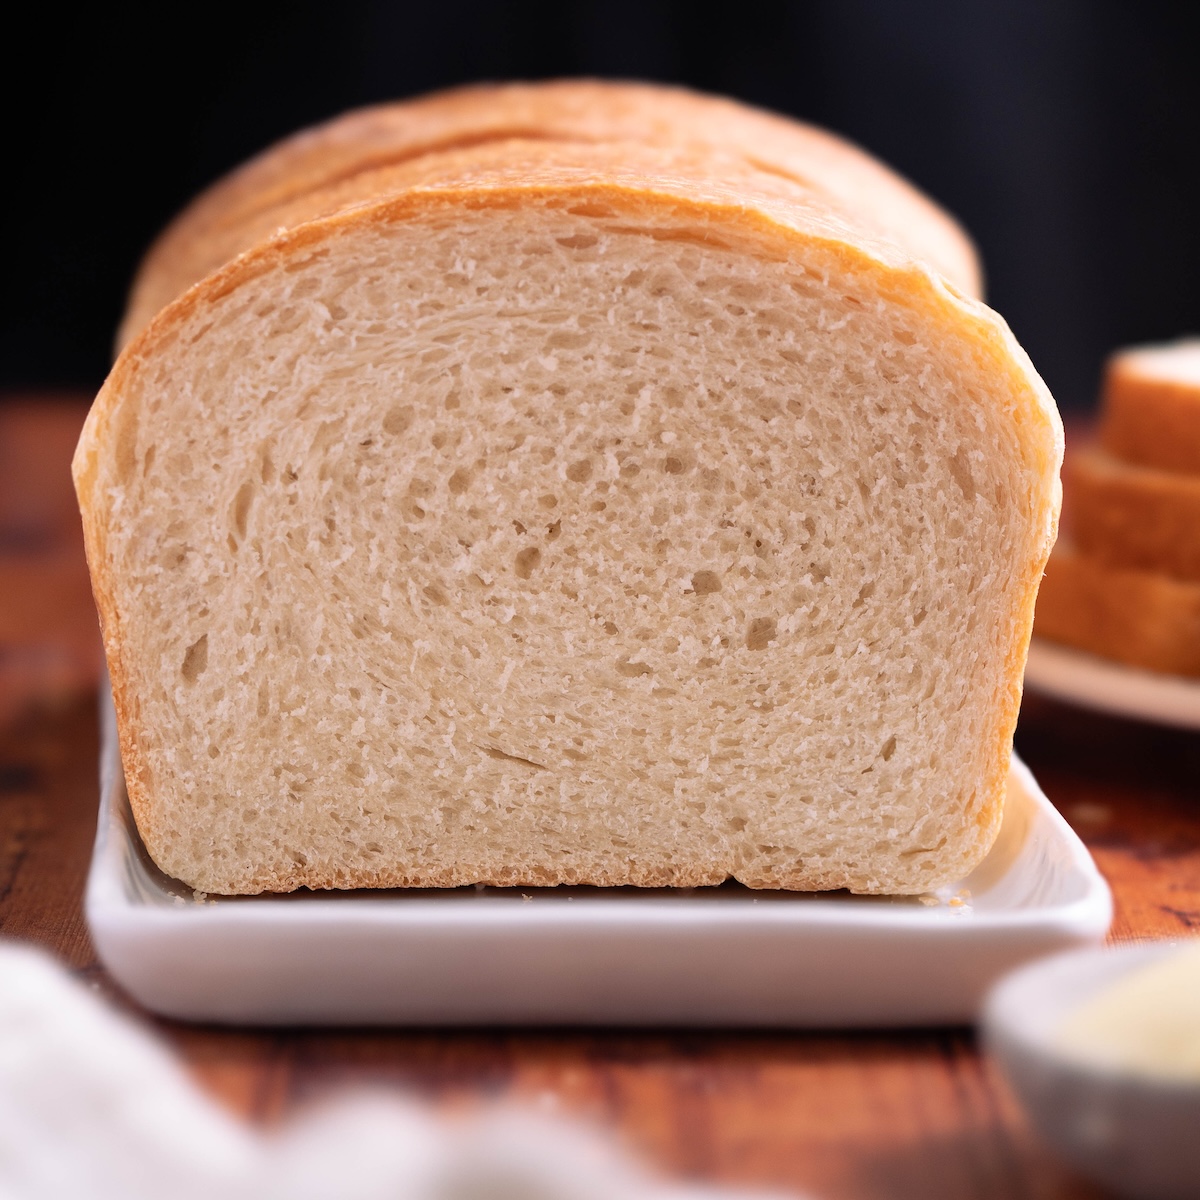
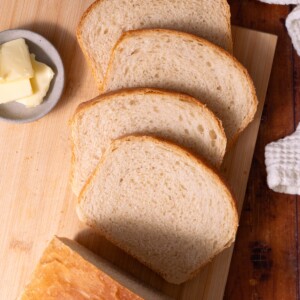
You can finally stop relying on store-bought bread, because this sourdough sandwich bread has everything you want in a loaf. It’s soft, buttery, and chewy, with a soft crust and that beautiful sourdough tang.
Even better, it’s designed to be approachable and beginner-friendly. I’ve simplified the process as much as possible so you can make a tasty, reliable sandwich loaf without complicated steps, specialty ingredients, difficult technique, or fancy equipment.
This recipe is inspired by a classic white sandwich bread I once baked daily while working in an award–winning restaurant in North Carolina. Here, I’ve adapted that professional formula to work with sourdough starter instead of commercial yeast, so you can enjoy the same soft texture and delicious flavor at home.
Recipe highlights
- Soft, chewy, buttery and delicious – the perfect homemade sandwich bread
- Simplified recipe because bread doesn’t need to be complicated!
- Made with just 6 simple ingredients
- An overnight rise helps develop deeper flavor and a better texture
- Makes perfect sandwiches, toast, garlic bread, and more
Recipe overview
⏱️ Prep: 20 mins • Rise: Overnight + 3-4 hrs • Bake: ~50 mins
🍴 Yield: 1 sandwich loaf
💪 Skill level: Beginner
😋 Flavor notes: Butter, milk, sourdough tang. Pairs well with: Butter, jam, cheese, breakfast, just about any sandwich toppings.
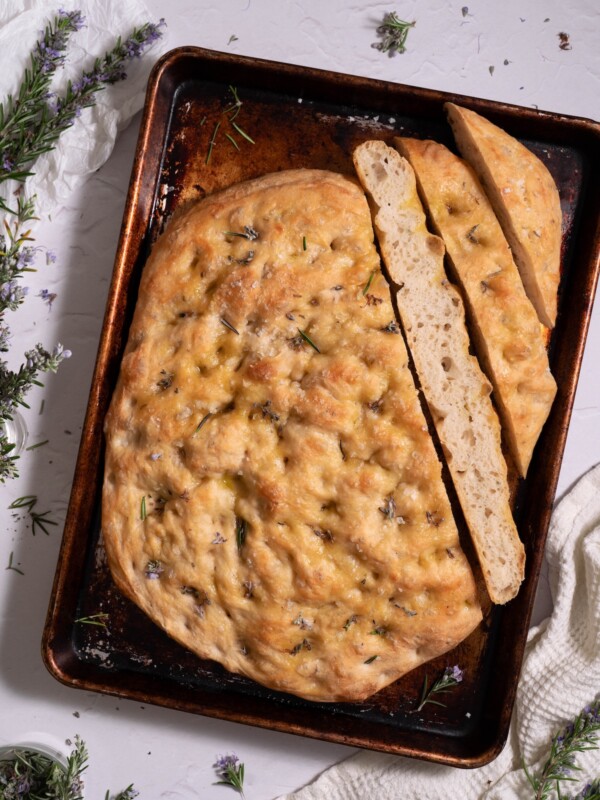
👉 If you enjoy this recipe, you might also like my Nettle Pesto Swirl Bread, Cinnamon Sugar Sourdough, and Rosemary Sea Salt Sourdough.
Ingredient notes & substitutions
Flour: I use bread flour for this recipe, but you can also use all purpose flour. Bread flour is higher in protein and will provide a bit more structure, while all purpose will result in a slightly softer bread.
Sourdough starter: You’ll need to feed your starter ahead of time so that it’s bubbly and active before you add it to the bread dough.
Milk: I recommend using whole milk here, as the fat content adds richness and moisture to this bread, helping it stay soft for days.
Butter: Butter does double duty in this recipe. Mixed into the dough, it adds richness, flavor, and softness. Then, a brush of melted butter over the warm loaf after baking helps create that tender, supple crust that gives sandwich bread its classic texture.
Sugar: A little bit of sugar adds a lot of flavor to this loaf. I use brown, but you can substitute granulated white sugar if you like.
How to make sourdough sandwich bread
Find the full ingredients list and detailed recipe instructions in the recipe card at the bottom of this post. Here’s a quick step-by-step overview of how to make this recipe:
- Warm the liquids: In a small saucepan, melt the butter. Turn off heat and add water and whole milk, stirring to combine. The liquids should be warm to the touch, about 100° F.
- Add remaining ingredients: Pour milk mixture into the bowl of a stand mixer and add brown sugar and salt, whisking to combine. Whisk in sourdough starter, then bread flour, and fold everything together until blended.
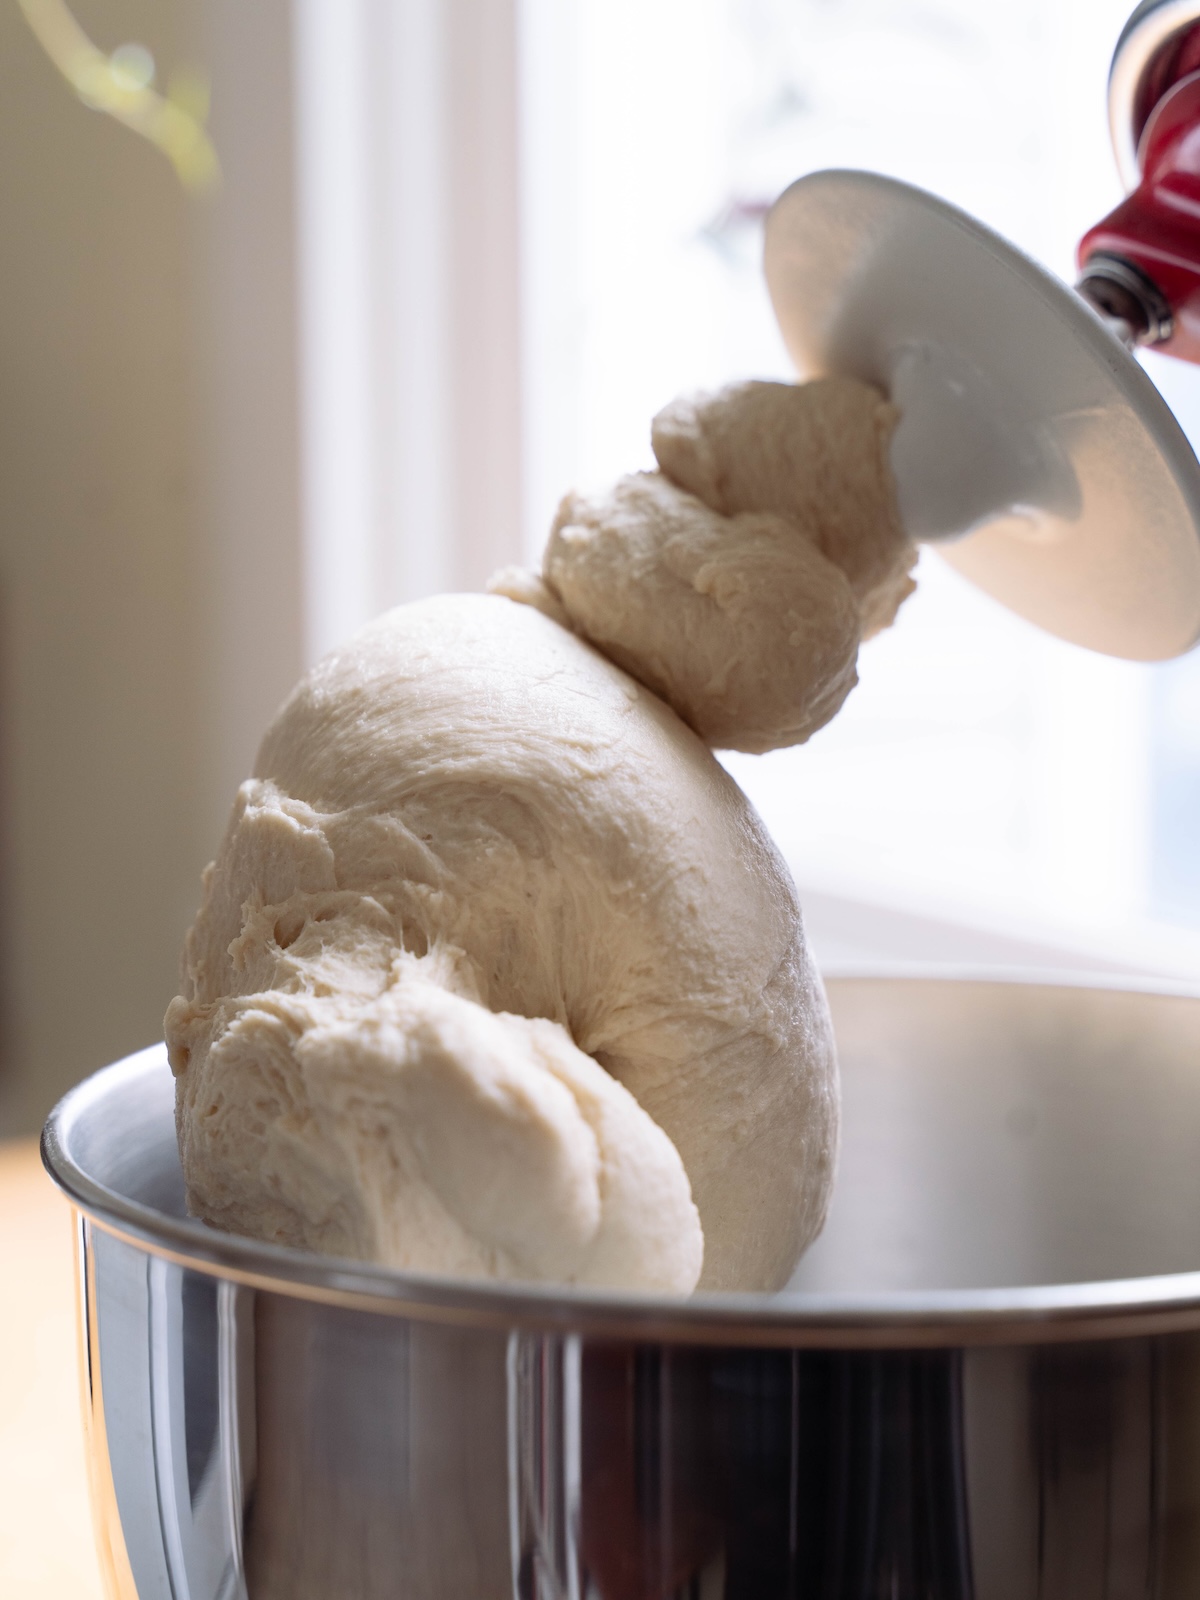
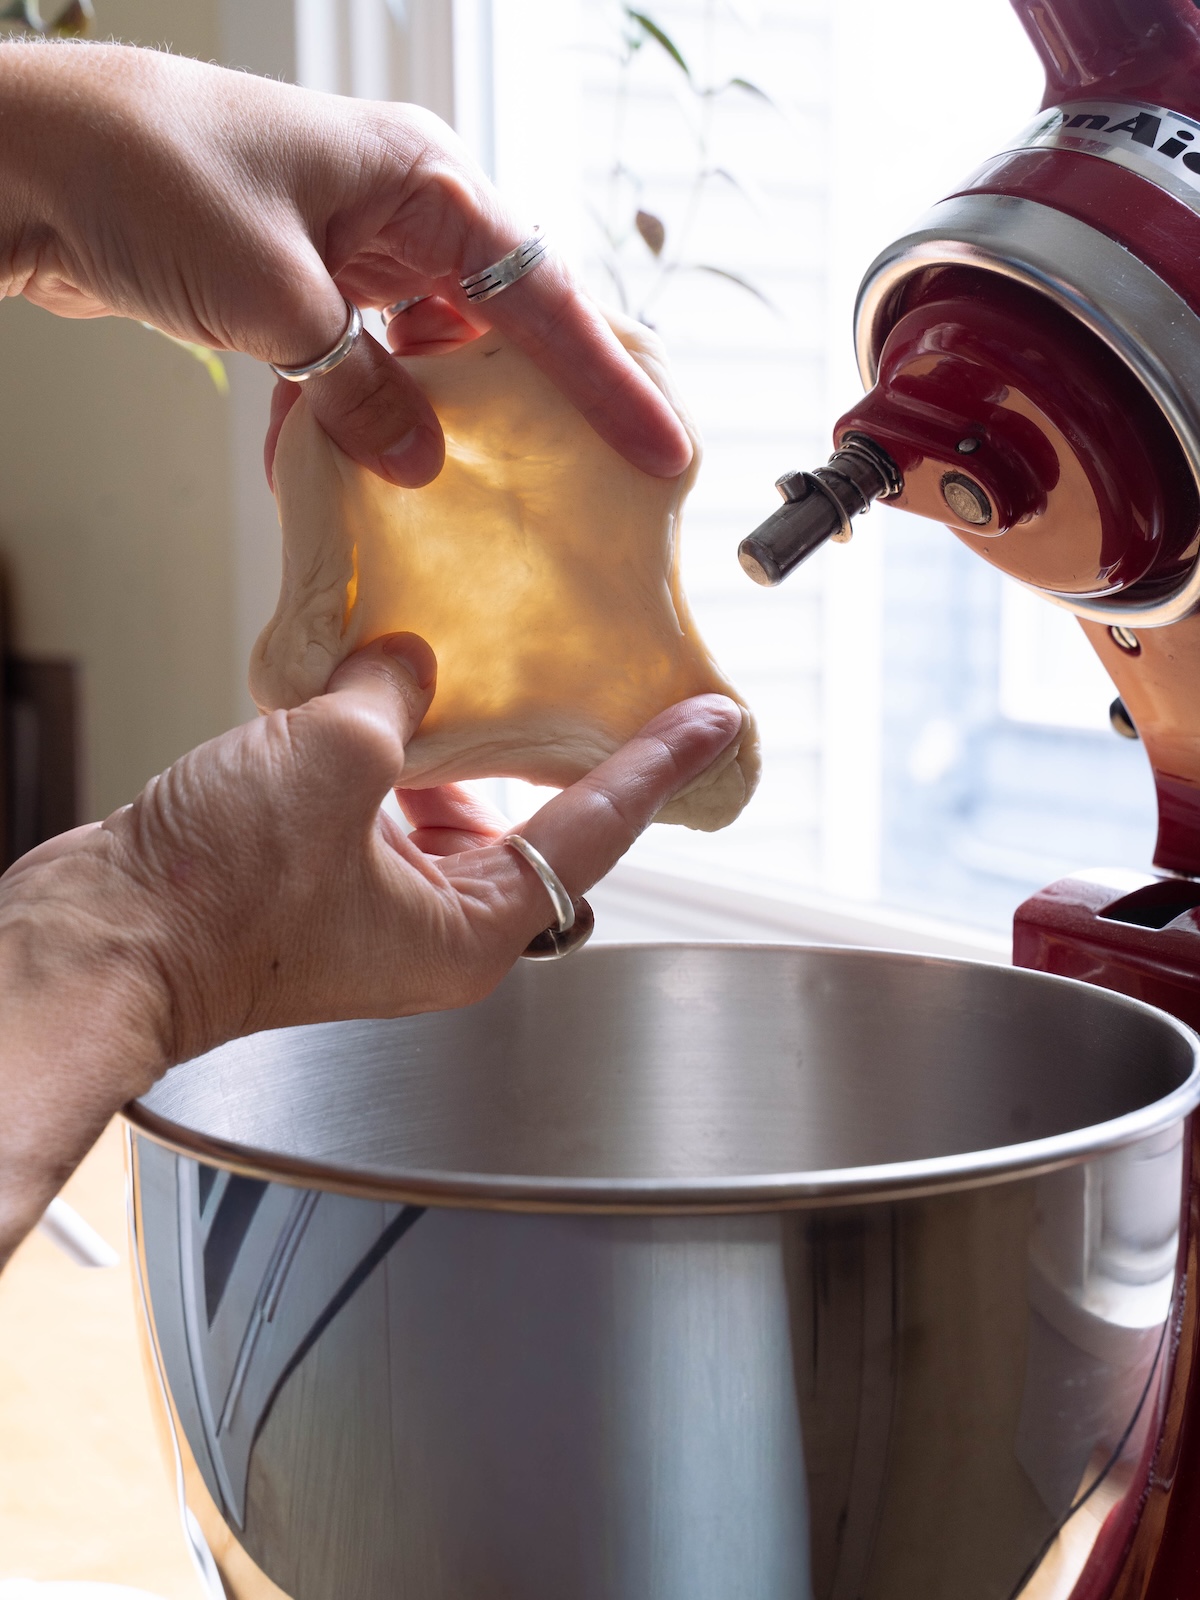
- Knead: Attach a dough hook to your stand mixer and knead bread dough on medium speed until dough is smooth, elastic, and pulls away from the bottom and sides of the bowl, about 7-10 minutes. The dough should pass the windowpane test (see image below).
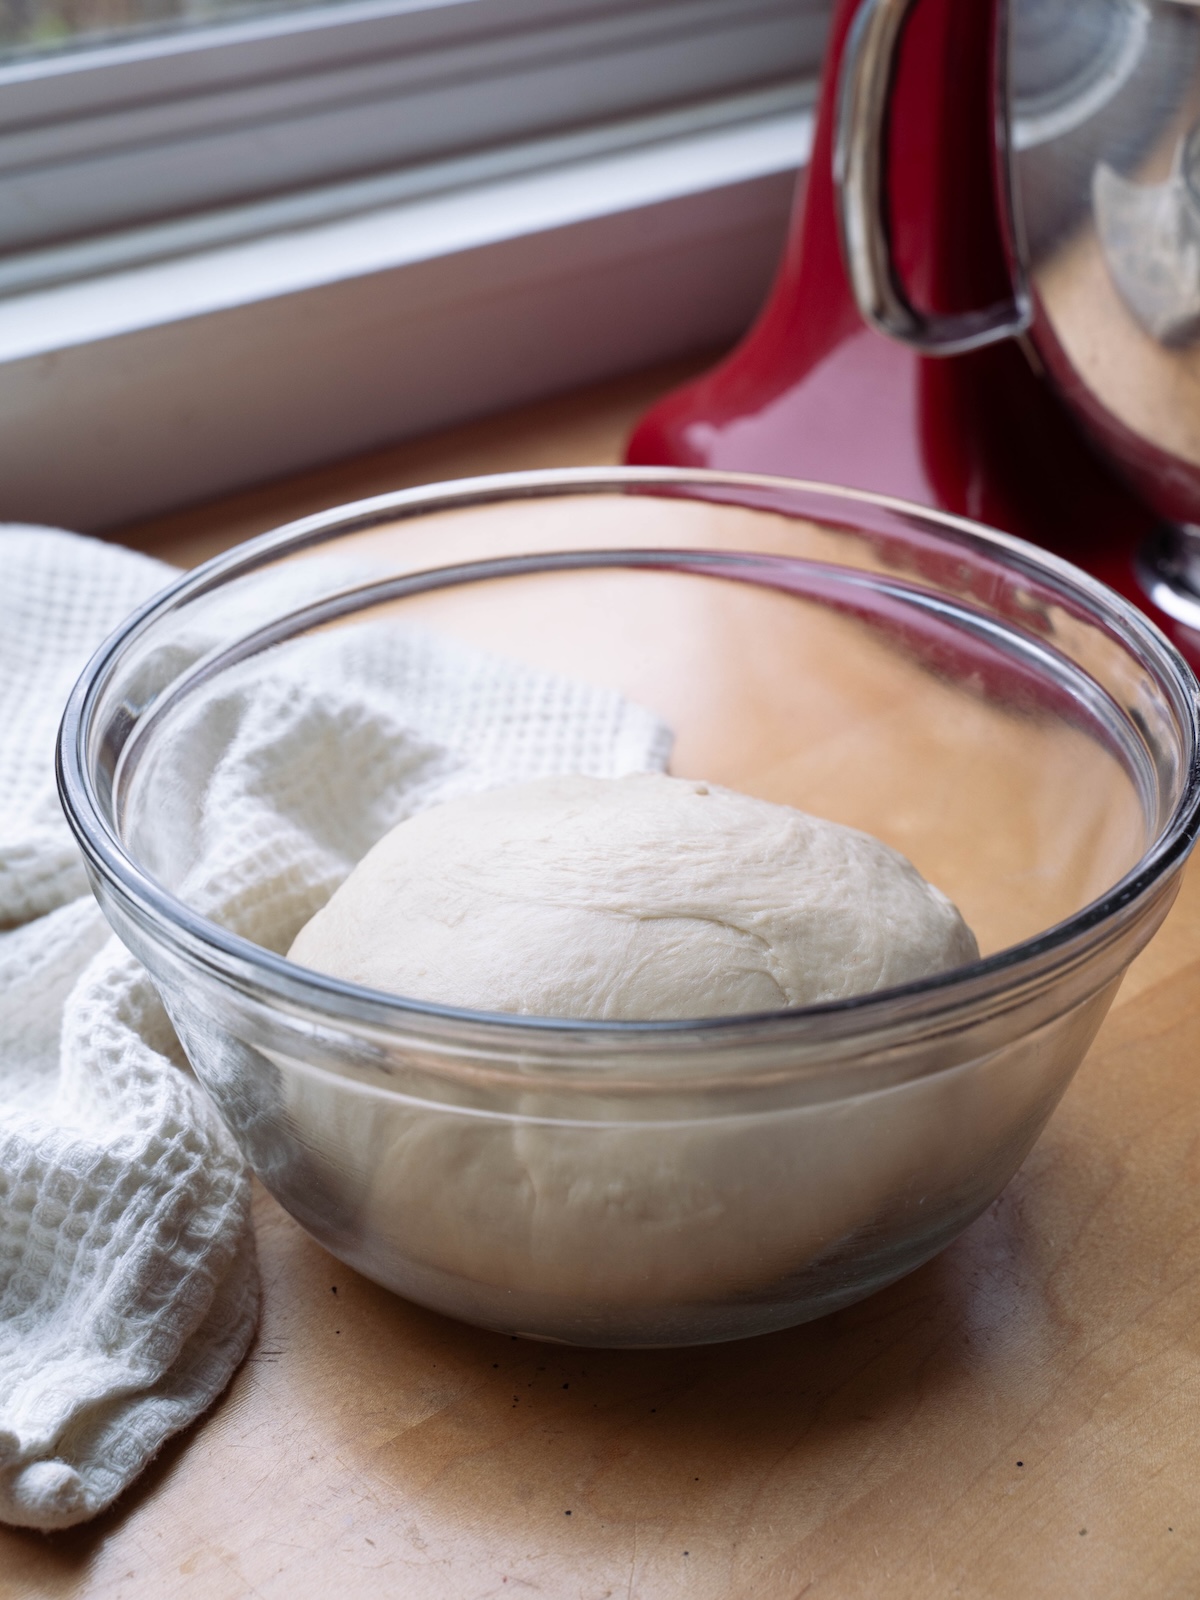
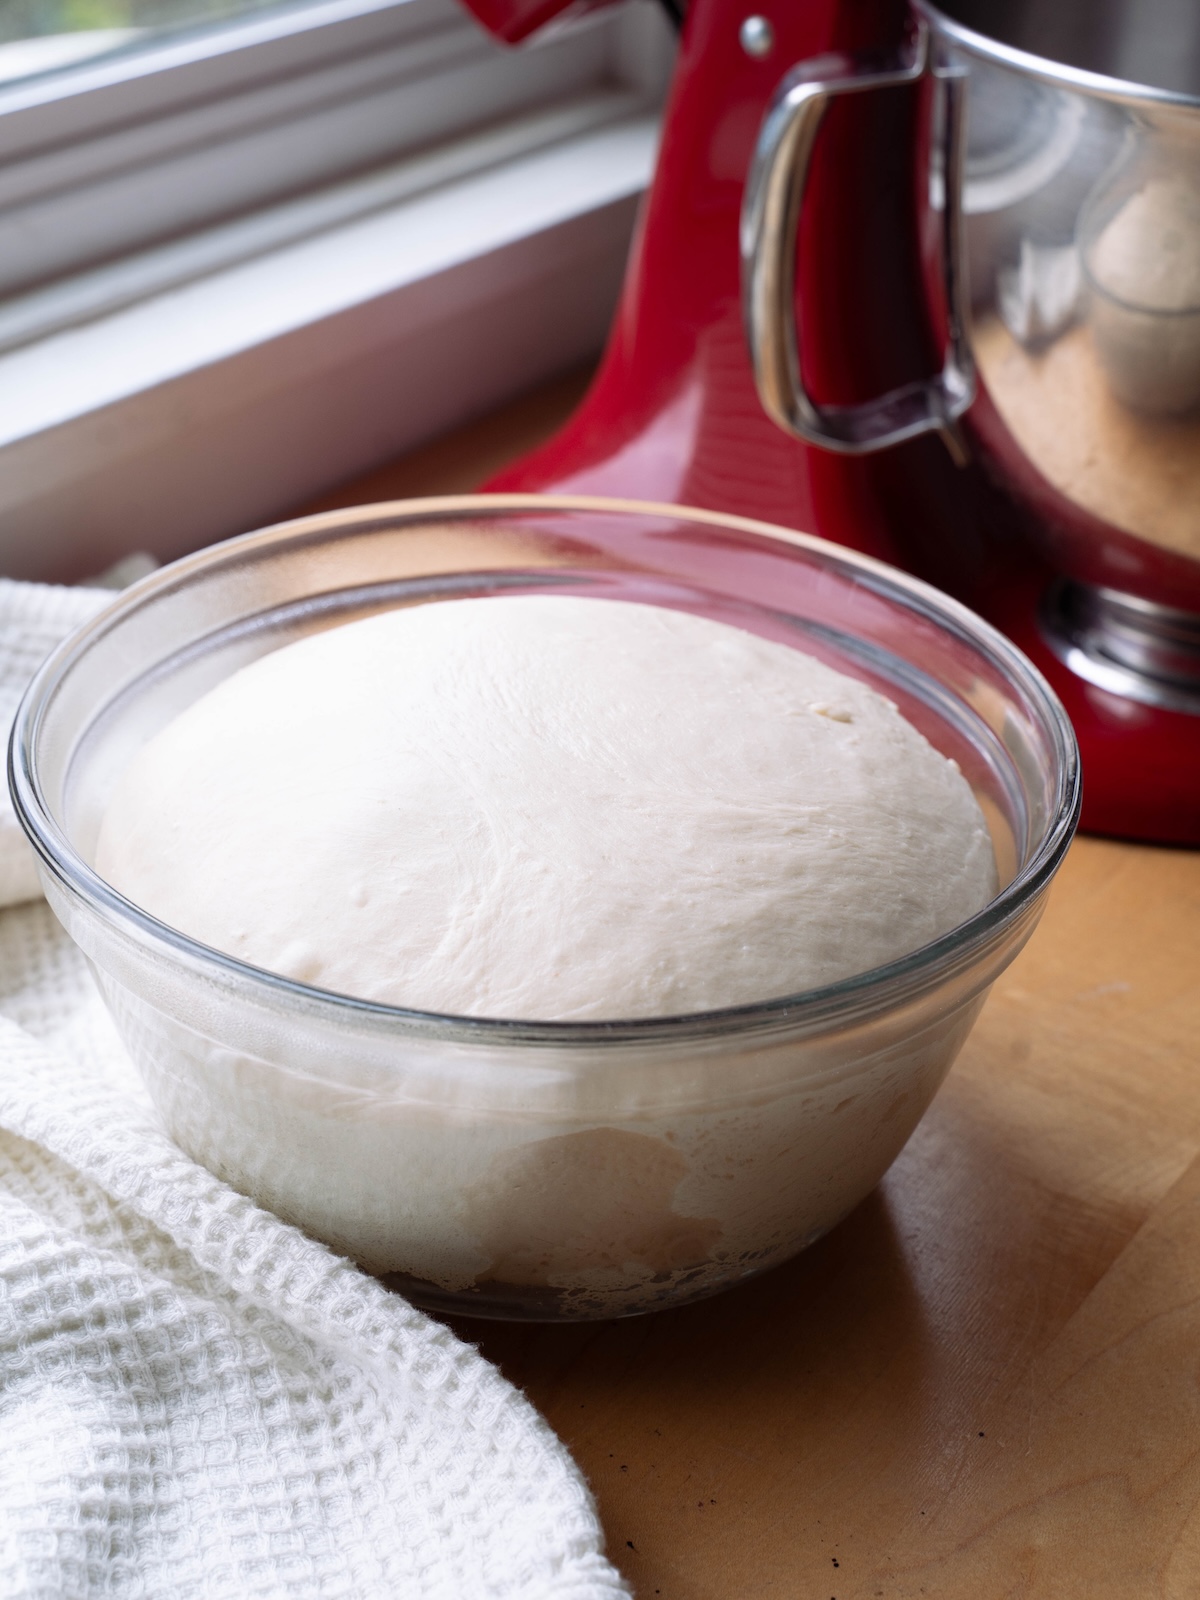
- Ferment overnight: Place the dough in an oiled bowl, turning to coat. Cover and leave to ferment overnight at room temperature.
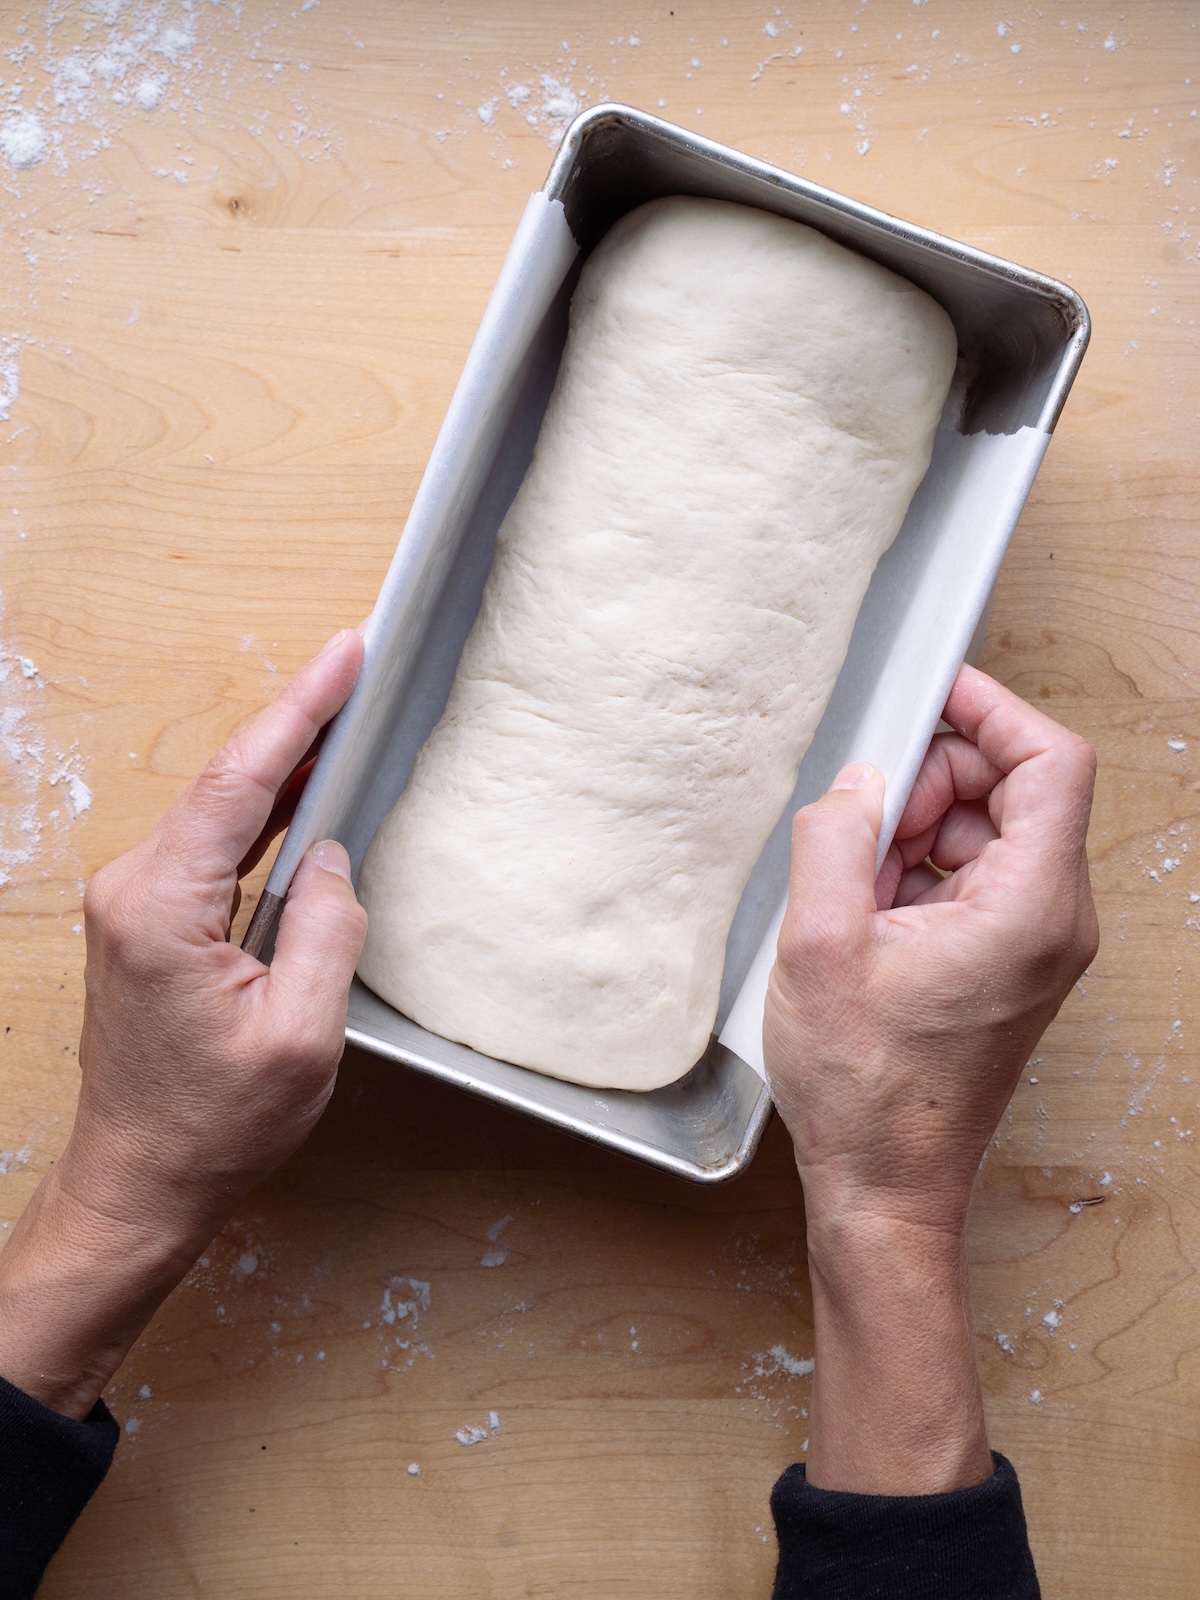
- Prepare pan: Butter the bottom and sides of a 9×5-inch loaf pan. For easiest removal after baking, line the bottom of the pan with parchment paper.
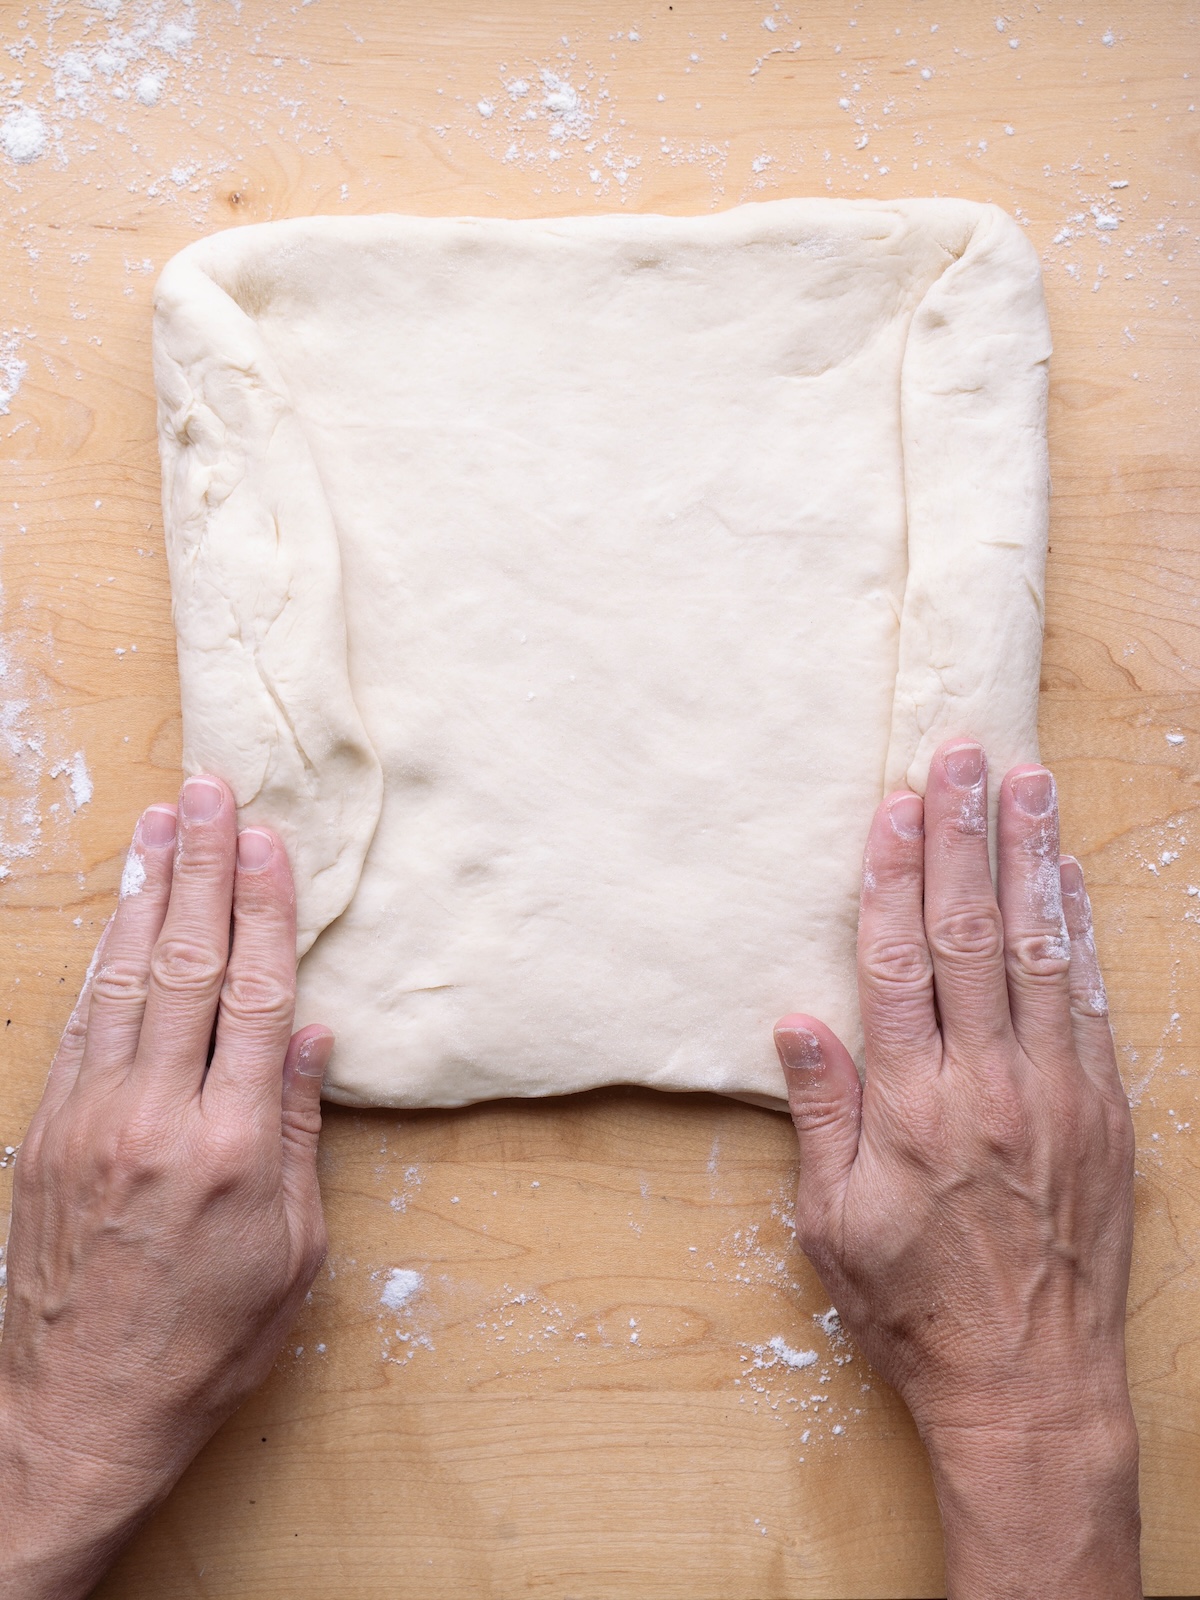
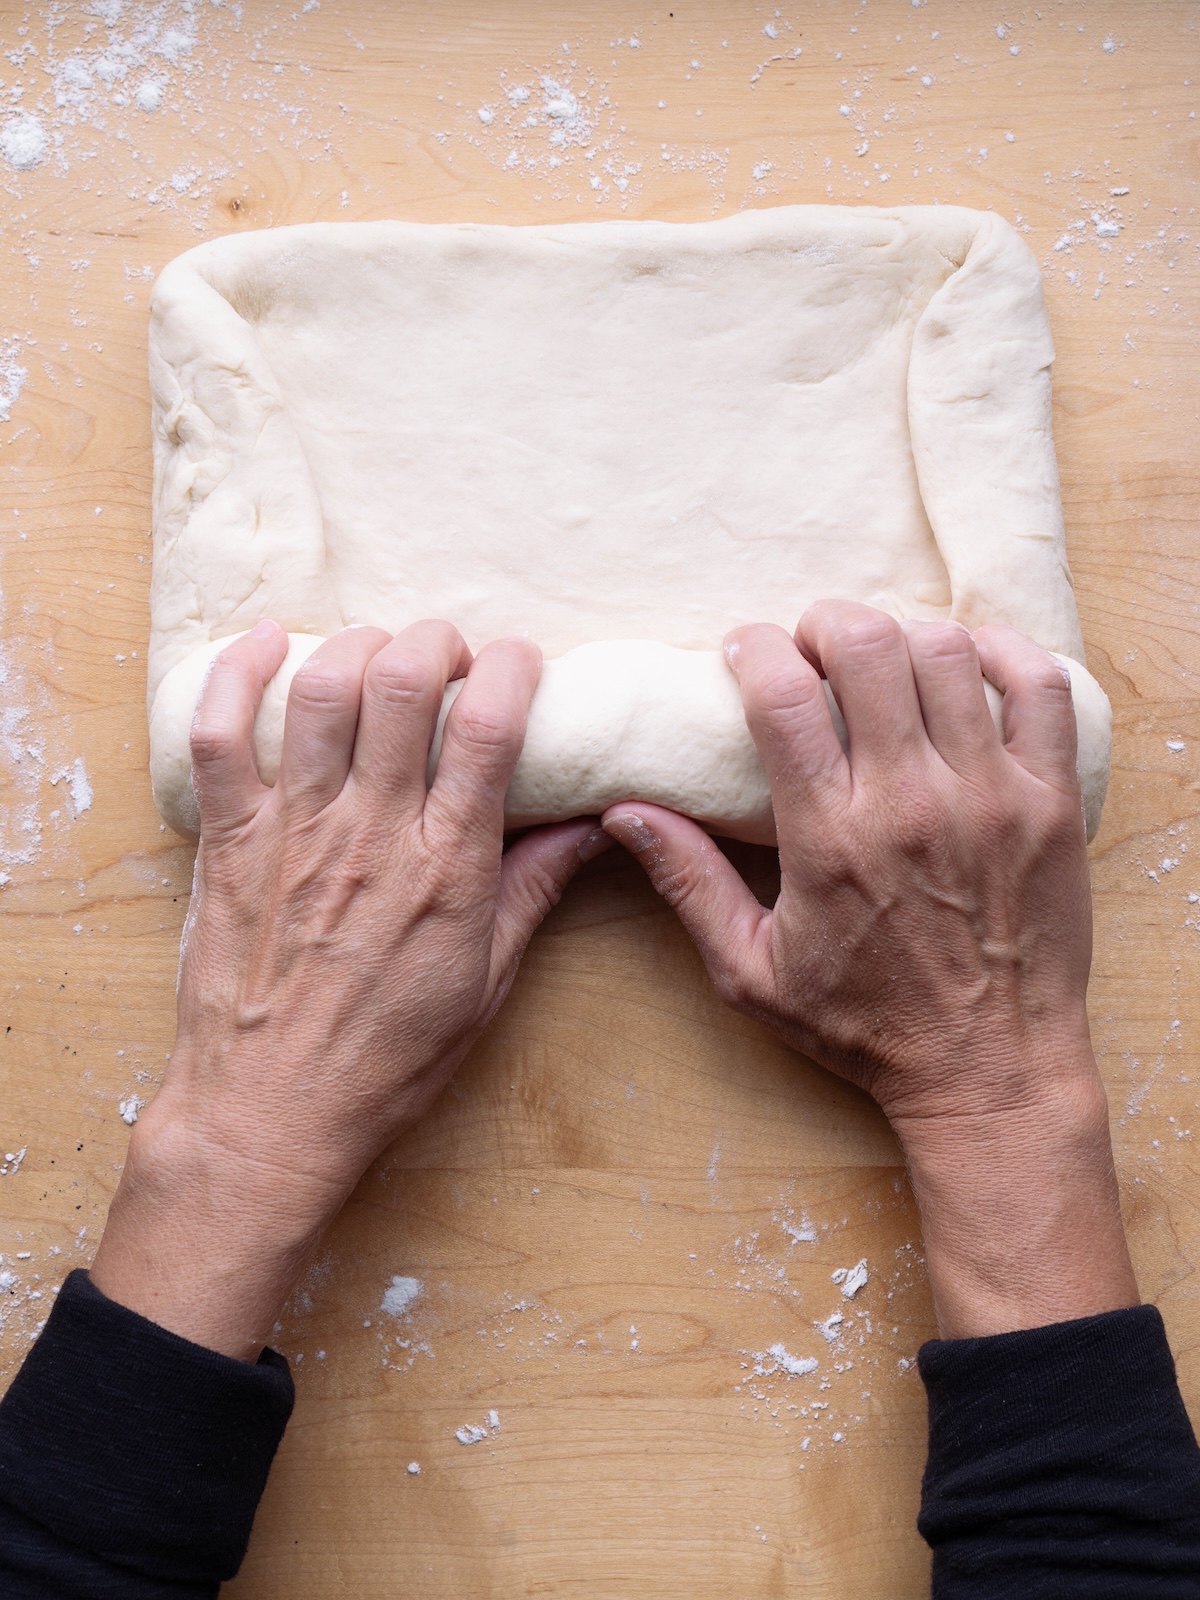
- Shape: Place dough on a lightly floured work surface. Use floured hands or a rolling pin to gently press the dough into a square, roughly 12×12 inches. Fold about an inch of dough in on the two sides parallel to you. Roll dough into a tight log and inch the seams shut. Place in the prepared pan.
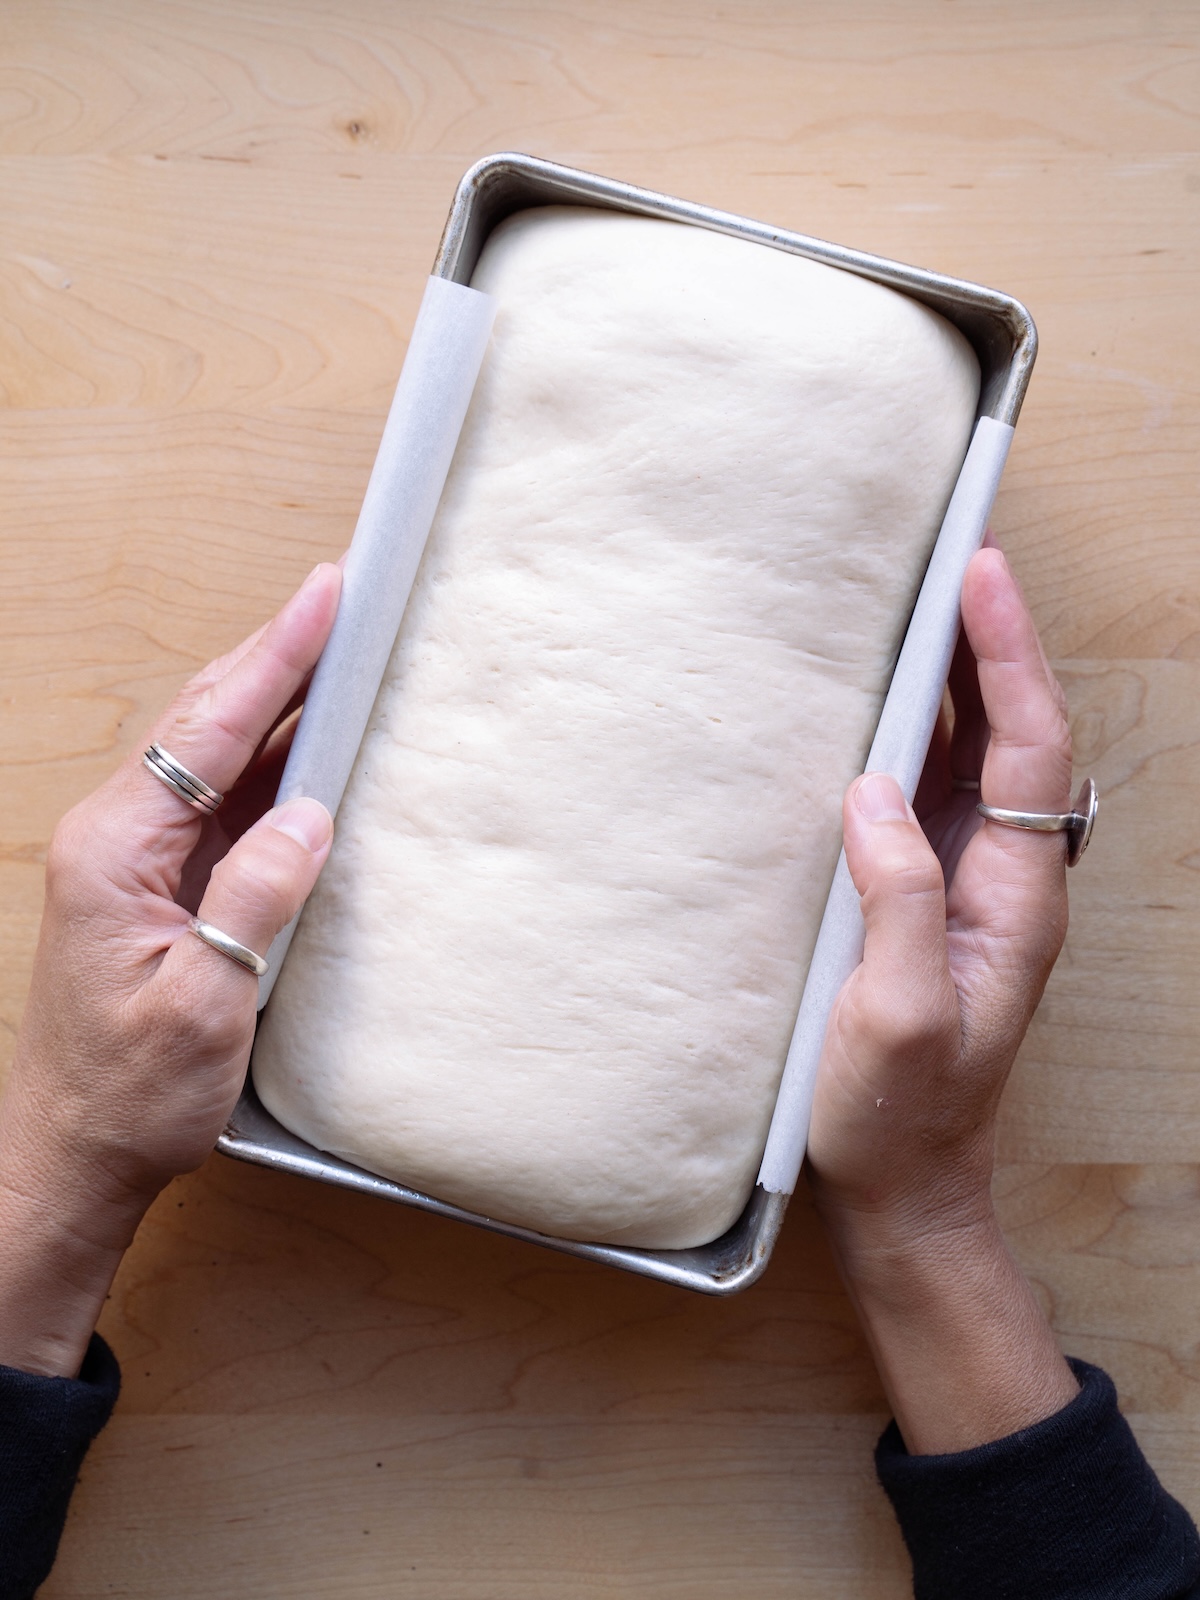
- Proof: Cover the dough and let it rise in a warm place until airy and noticeably less dense. It should rise ½ -1 inch above the lip of the pan. This may take a few hours.
- Bake: Place in a preheated 375° F oven and bake until golden on top and cooked in the middle, about 45-55 minutes. Brush top of bread with melted butter and allow bread to cool at least 15 minutes in the pan, then remove and place on a cooling rack to finish cooling.
Baker’s tips for professional-quality bread
Get the temperature right on the wet ingredients. When warming the milk and water, make sure the temperature of this mixture is between 90 – 110° F (it will feel lightly warm to the touch) before adding it to the remaining ingredients. This will help the dough start off slightly warm, which helps to activate the sourdough starter.
Use an active, recently fed sourdough starter. We’re not using any yeast or other leavening agents in this recipe, so we’re completely relying on the sourdough starter to make the bread rise. Feed your starter several hours before you make this bread so that it’s active and bubbly.
Use the windowpane test. This is a simple way to check whether bread dough has developed enough gluten. Pinch off a small piece of dough and gently stretch it between your fingers. If the dough stretches thin enough to become almost translucent (like a little “window”) without tearing, the gluten network is well developed and the dough is ready to rest and ferment.
If the dough tears quickly or breaks before you can stretch it thin, it usually needs more kneading. A successful windowpane test means the dough will be better able to trap gas during fermentation, helping you achieve a lighter crumb and better rise in the finished loaf.
Be patient. Because this sandwich bread is made without yeast, it may take a while to rise. Ingredients like sugar, milk, and butter can cause sourdough to rise slower than a lean loaf. The final proofing stage could take anywhere from 2-6 hours. In my house at about 68° F, it usually takes about 4 hours to proof.
Brush with butter. Brushing the loaf with melted butter after baking doesn’t just add flavor, it also softens the crust.
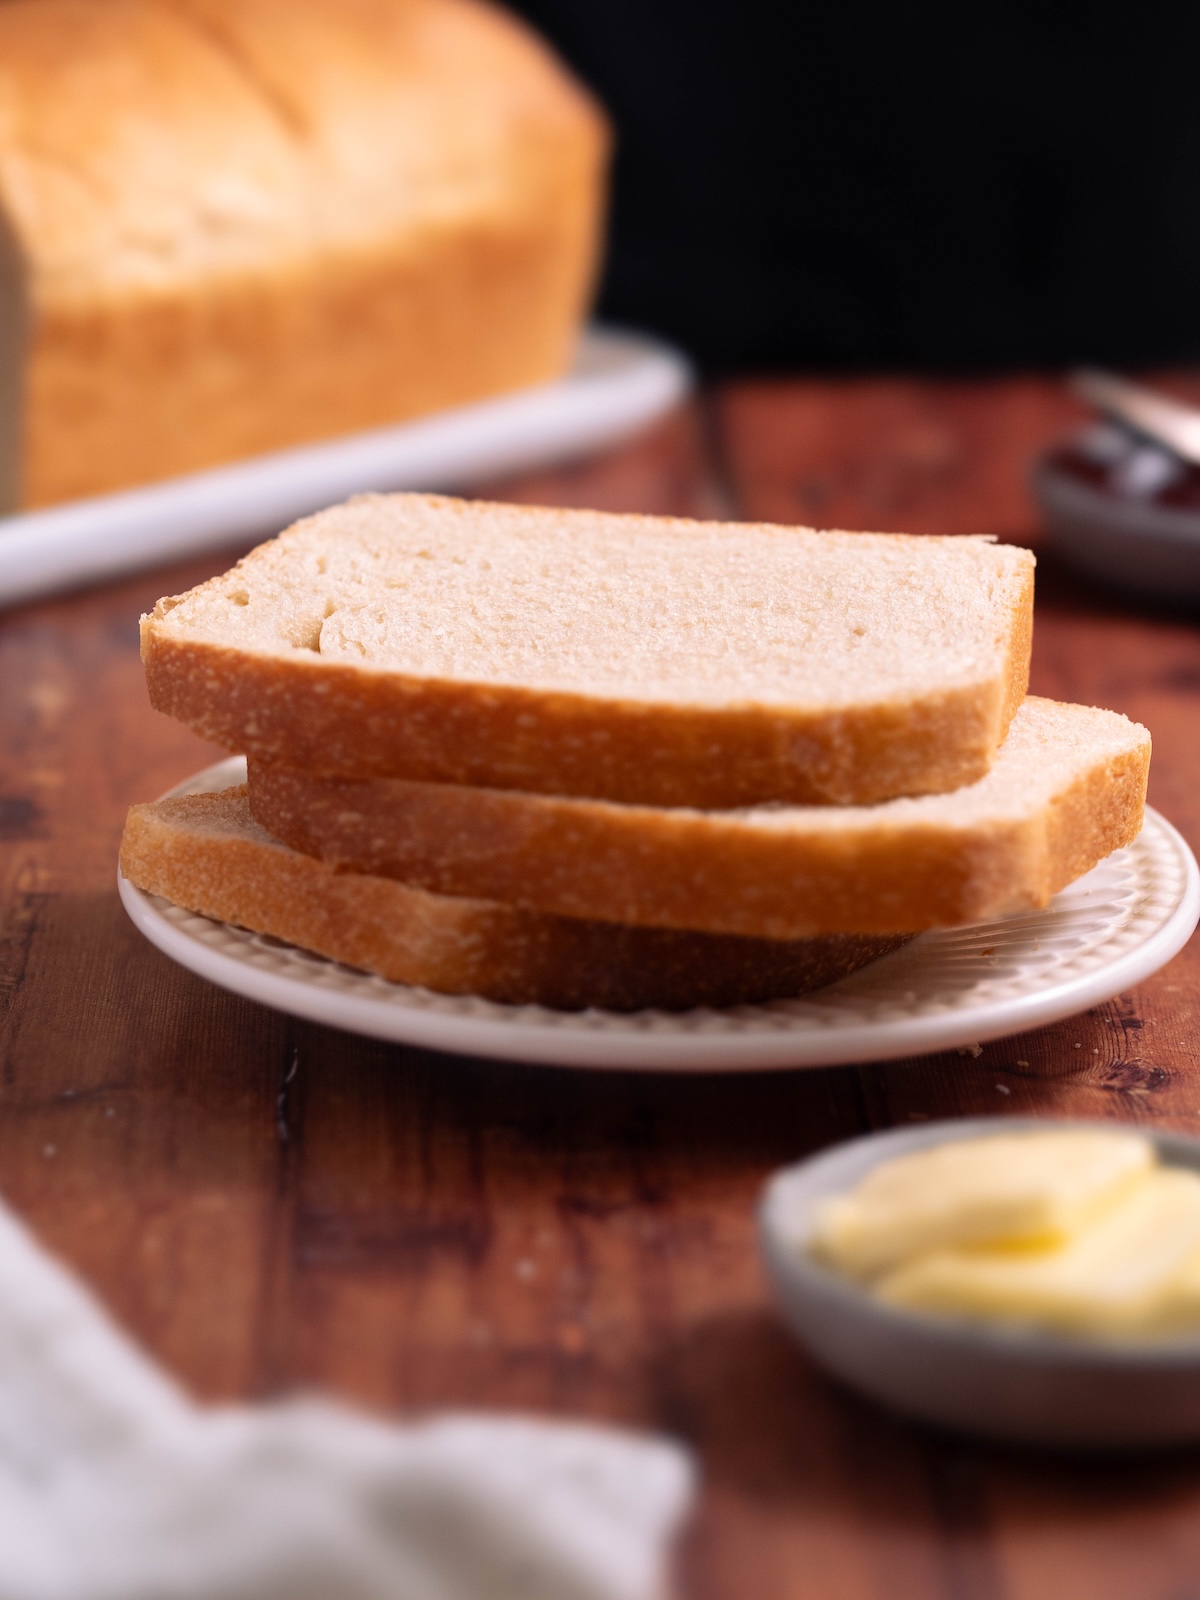
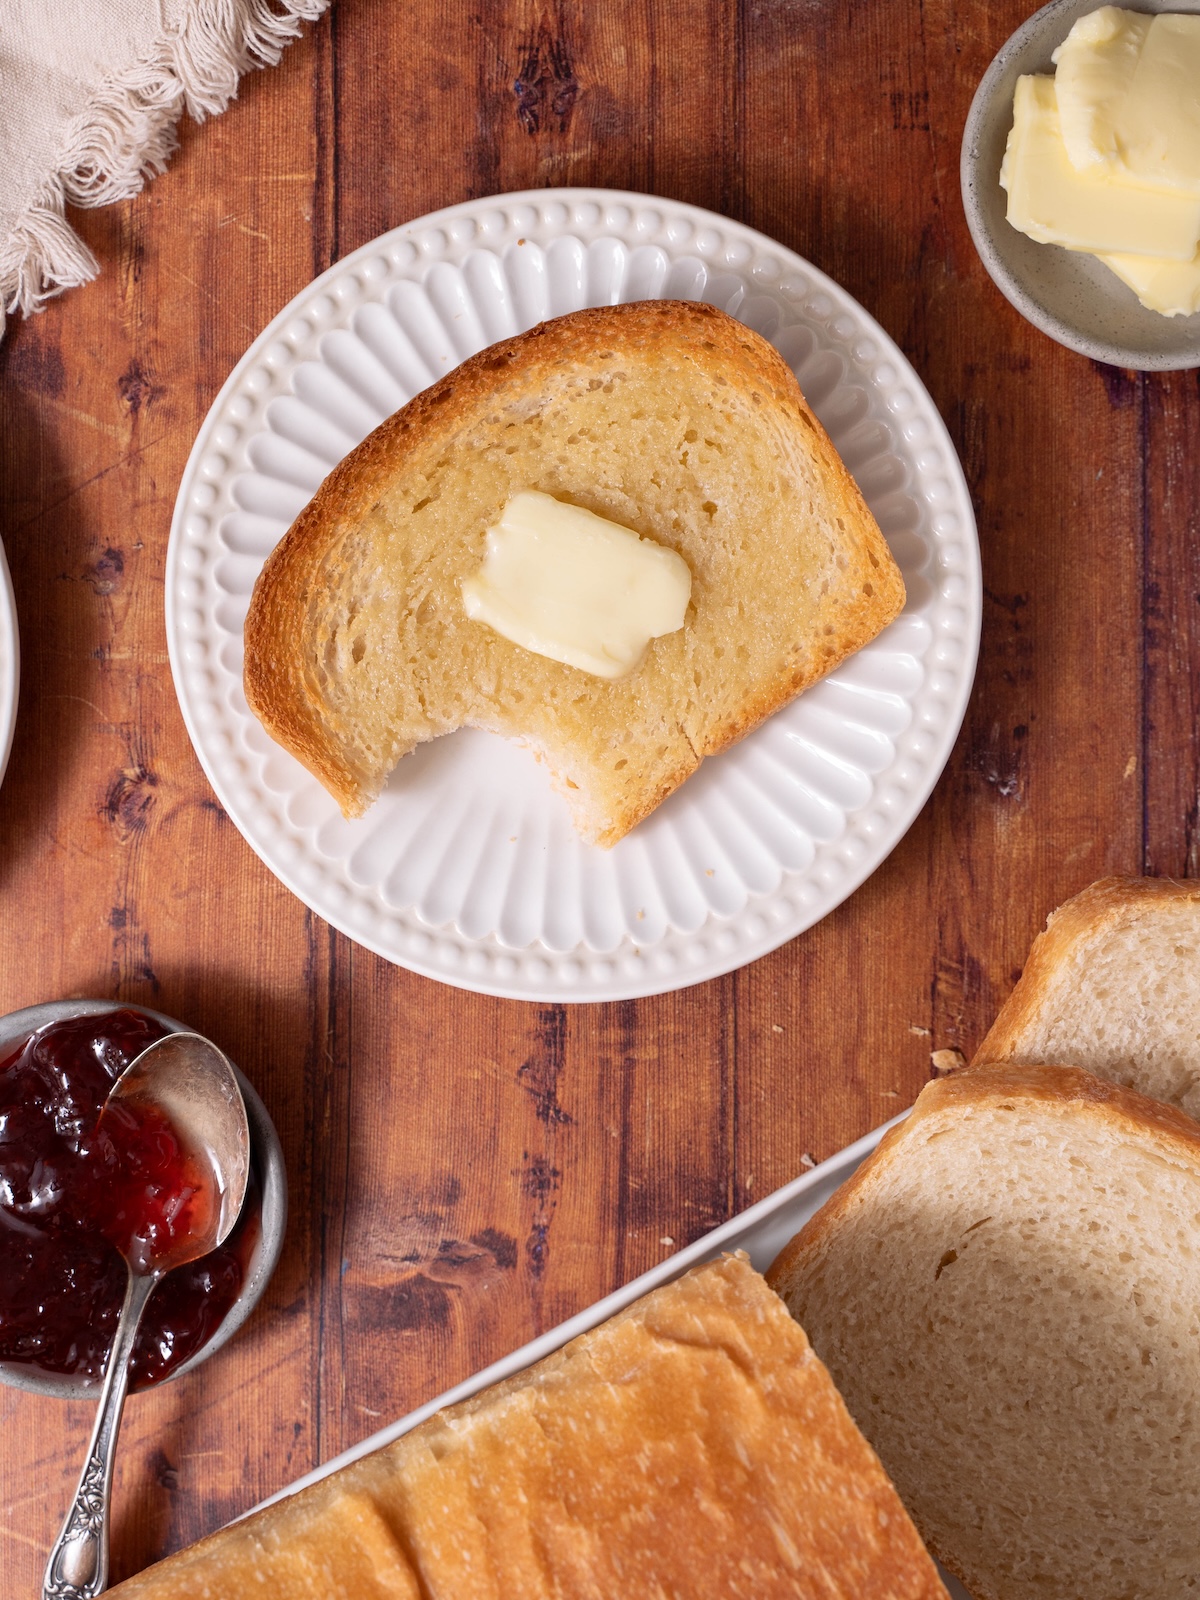
Serving & storing sourdough sandwich bread
There are so many delicious ways to enjoy a fresh loaf of sourdough sandwich bread. Here are a few simple ideas to get you started:
- Toast thick slices and serve warm with butter and jam
- Enjoy alongside your favorite breakfast with eggs, bacon, or fruit
- Use it to make perfectly melty grilled cheese sandwiches
- Spread with garlic butter and a sprinkle of grated parmesan, then toast until golden and bubbly
- Layer with your favorite fillings and condiments for everyday sandwiches
You can also cube leftover slices for homemade croutons or use them to make buttery French toast or bread pudding.
To store this bread, keep it wrapped at room temperature for up to 5 days. This sandwich loaf stays soft a lot longer than artisan sourdough bread, thanks to the addition of butter and milk!
It also freezes well. I recommend slicing it first, then laying the slices on a baking sheet and freezing until solid. Once frozen, store the slices in a freezer bag for up to a month. Thaw at room temperature or toast in an oven or toaster oven.
If you make this Sourdough Sandwich Bread, please leave a comment & star rating. It makes a huge difference for me and for recipe seekers. Thank you!
Sourdough Sandwich Bread
Equipment
- 9×5 inch loaf pan
- Stand mixer with dough hook
Ingredients
- 2 ounces (4 tbsp) unsalted butter
- ¾ cup water
- ¼ cup whole milk
- 3 tablespoons (28 grams) brown sugar
- 1 ½ teaspoons (11 grams) salt
- 100 grams active sourdough starter
- 510 grams bread flour
- 1 tbsp melted butter, for top after baking
Instructions
- Warm the liquids: In a small saucepan, melt the 2 oz butter. Turn off heat and add ¾ cup water and ¼ cup whole milk, stirring to combine. The liquids should be warm to the touch, about 100° F. If they’re not, turn the heat back on low and continue heating until warm. If they're too hot, allow them to sit until cool.
- Add remaining ingredients: Pour milk mixture into the bowl of a stand mixer and add 3 tbsp brown sugar and 1 ½ tsp salt, whisking to combine. Whisk in 100 grams sourdough starter, then 510 grams bread flour, and fold everything together until blended.
- Knead: Attach a dough hook to your stand mixer and knead bread dough on medium speed until dough is smooth, elastic, and pulls away from the bottom and sides of the bowl, about 7-10 minutes. The dough should pass the windowpane test*.
- Ferment overnight: Place the dough in an oiled bowl, turning to coat. Cover and leave to ferment overnight at room temperature.
- Prepare pan: Butter the bottom and sides of a 9×5-inch loaf pan. For easiest removal after baking, line the bottom and long sides of the pan with parchment paper.
- Shape: Place dough on a lightly floured work surface and dust the top of the dough with a little flour. Use floured hands or a rolling pin to gently roll and press the dough out into a square, roughly 12×12 inches (it doesn’t need to be perfect, just make sure it’s a little longer than your loaf pan). On the two sides that are parallel to you, fold about an inch of dough in over itself, pressing gently to adhere. Roll dough into a tight log, starting from the side closest to you. Pinch the seams shut and place dough in the prepared pan.
- Proof: Cover the dough and let it rise in a warm place until airy and noticeably less dense. It should rise ½ -1 inch above the lip of the pan. This may take anywhere from 2-6 hours. In my house at 68° F, it takes about 4 hours.When the bread is ready, preheat the oven to 375° F.
- Bake: Place bread in preheated oven and bake until golden on top and cooked in the middle, about 45-55 minutes. The internal temperature of the bread should read 200-210° F.Brush top of bread with 1 tbsp melted butter and allow bread to cool at least 15 minutes in the pan, then remove and place on a cooling rack to finish cooling. Let bread cool for at least an hour before slicing and serving.
Notes
Did you try this recipe?
Be sure to leave a comment below!