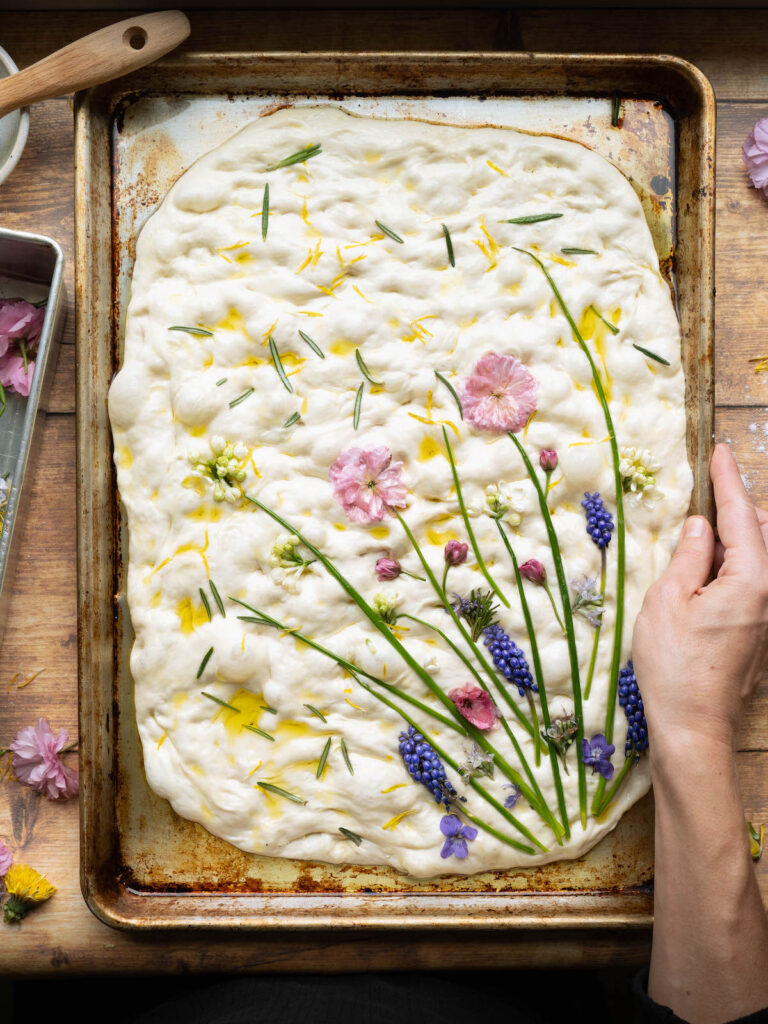
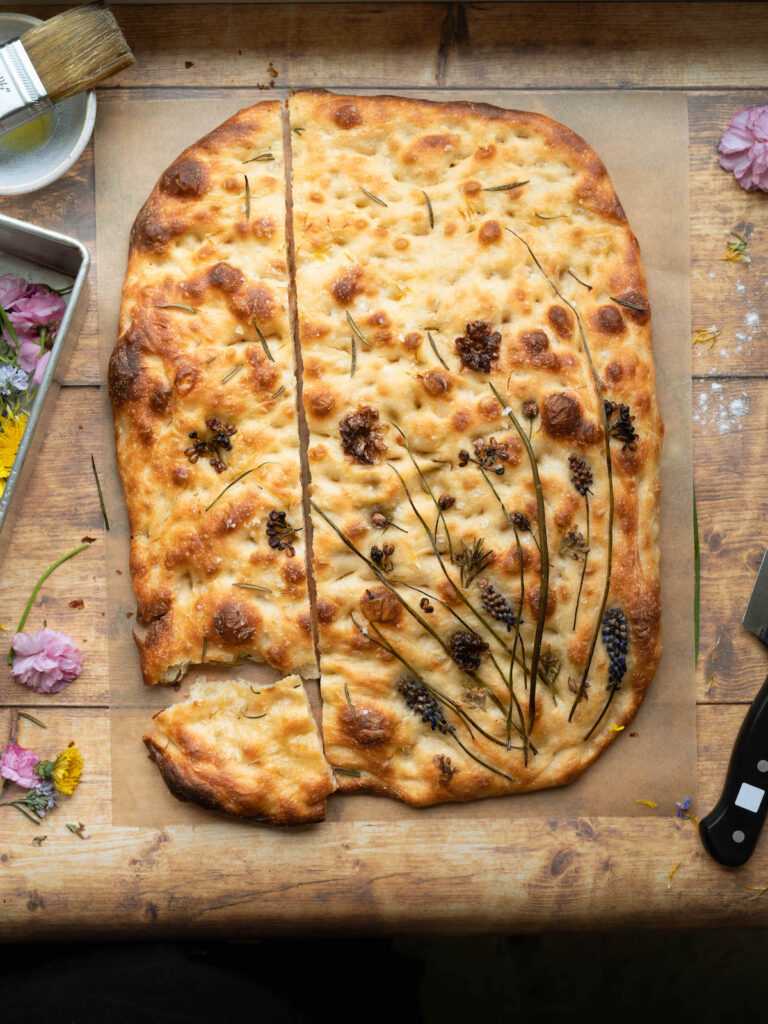
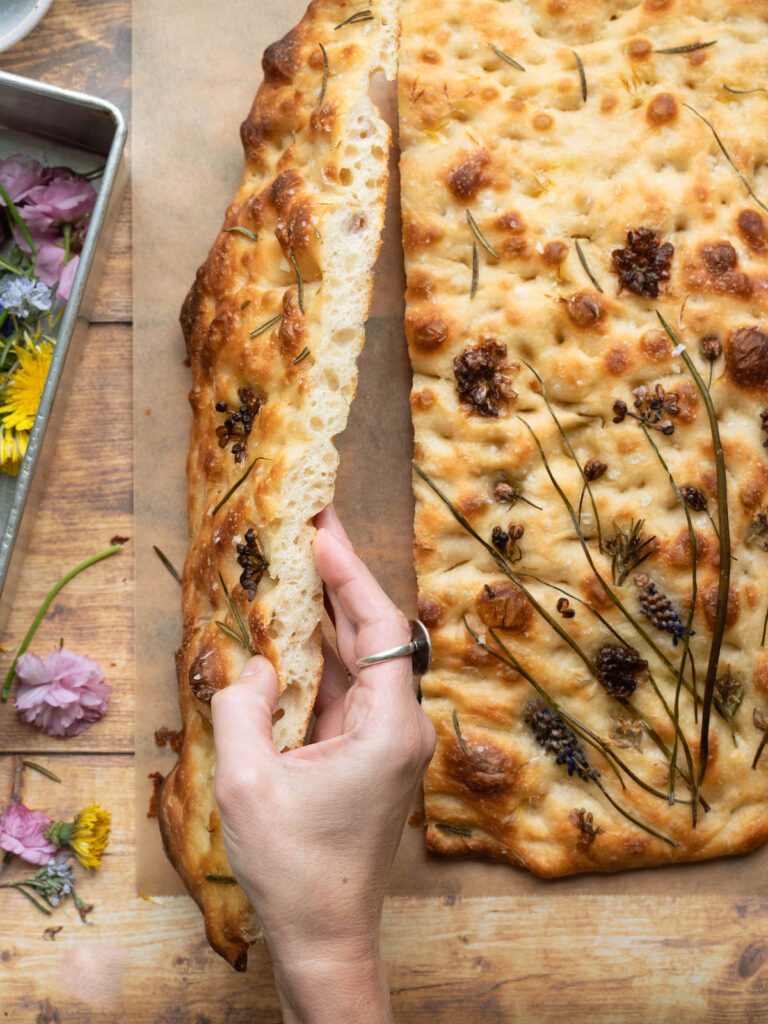
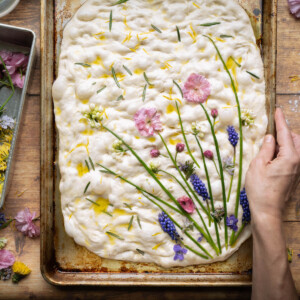
Today we’re making flower focaccia that’s almost too pretty to eat! This sourdough focaccia uses edible flowers and herbs to create a pretty little nature scene. Why not make our bread a piece of art?
I wish I could say it was my original idea to make flower art on focaccia, but I saw a picture of “garden focaccia” somewhere on the internet and was instantly inspired. I’m an absolute sucker for baked goods with edible flowers, and I love a good bread challenge, so I was very excited to make this.
Why this focaccia is worth making
Focaccia is one of my favorite types of bread. All that olive oil makes it soft on the inside and yet crispy on the bottom. Make it a sourdough focaccia, and things get even better.
It’s a versatile bread that you can use for sandwiches, breakfast toast, or simply dunking into soups and sauces. Plus, this garden focaccia is an absolute head spinner! It would be great to bring to a party or potluck, as it’s sure to get plenty of attention.
Tips for making flower focaccia
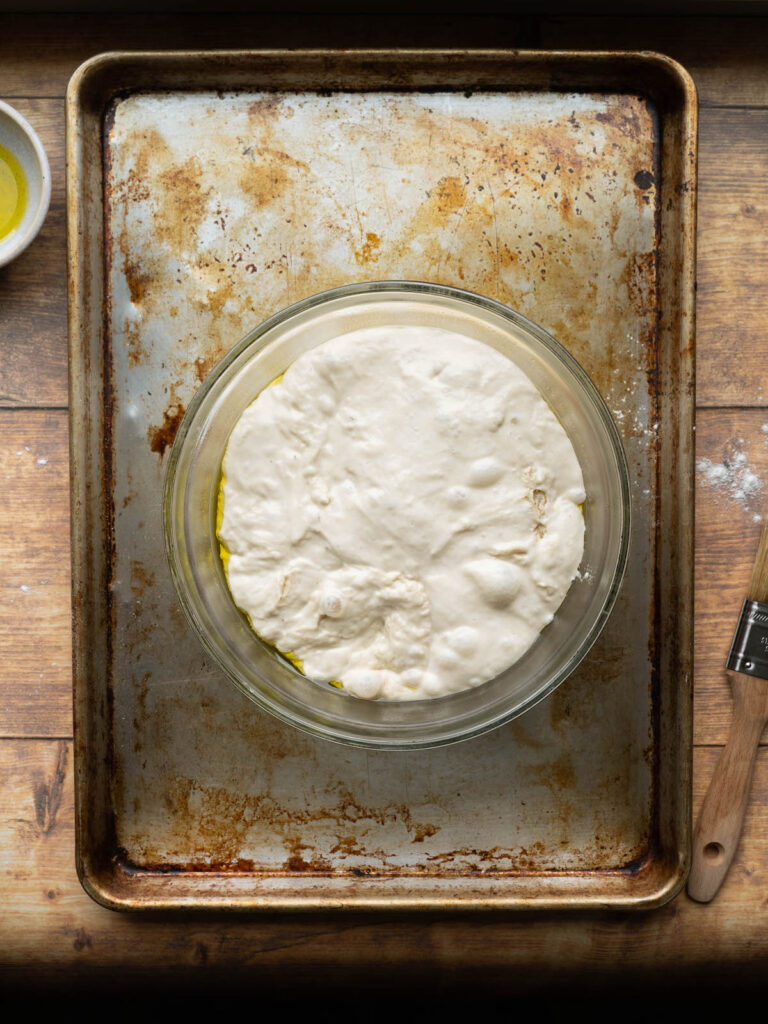
One thing I appreciate about this recipe is that you can mix the dough the night before, and then proof and bake the bread the next day. This not only makes the process easier by breaking the recipe into small steps, but it also helps the bread develop more flavor as it sits and lets the sourdough starter do its magic.
Possibly the toughest part when it comes to bread baking is practicing patience. Nine times out of ten when I’ve ruined a bread recipe, it’s simply because I got impatient and didn’t let the dough rise long enough. The amount of time needed for sourdough to proof can vary widely. Factors like how active your starter is and how warm your house is can affect the timing, so be patient and use your best judgment.
Focaccia requires a gluttonous amount of olive oil, so don’t be shy here! You’re going to smear it all over the baking sheet, drizzle it on top of your bread dough, and brush it onto all your flowers and herbs. It’s essential to the final flavor and texture of the bread! Also, brushing it on top of your flower art helps to keep them in place and prevent them from burning.
Variations
Flowers & Herbs:
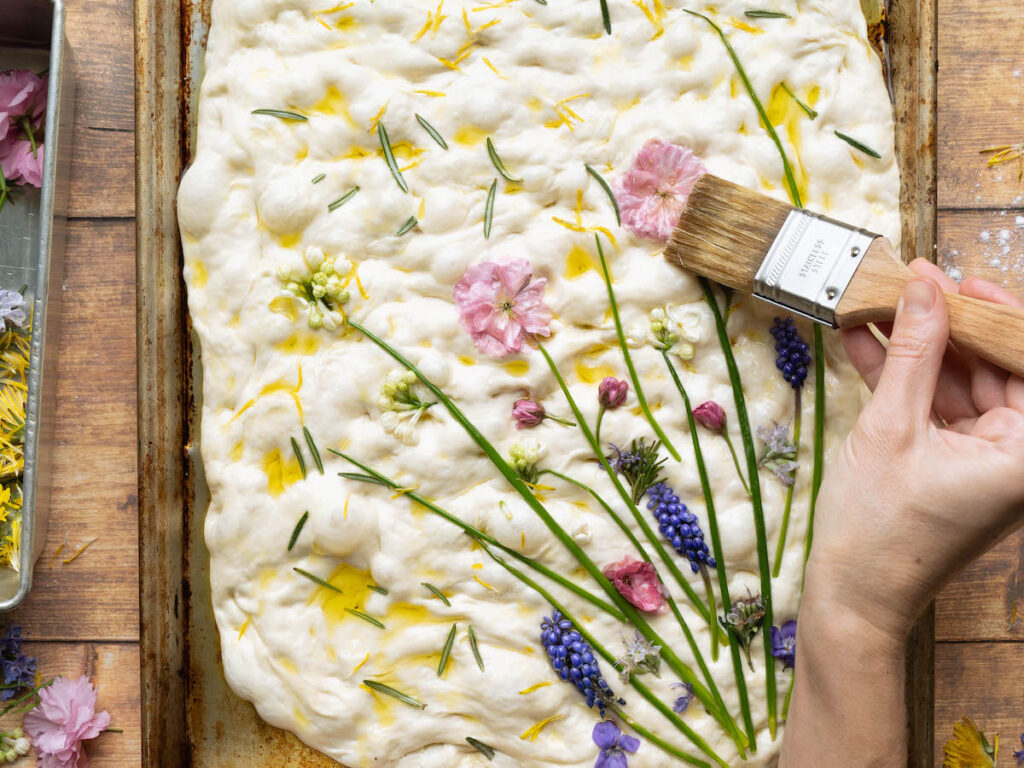
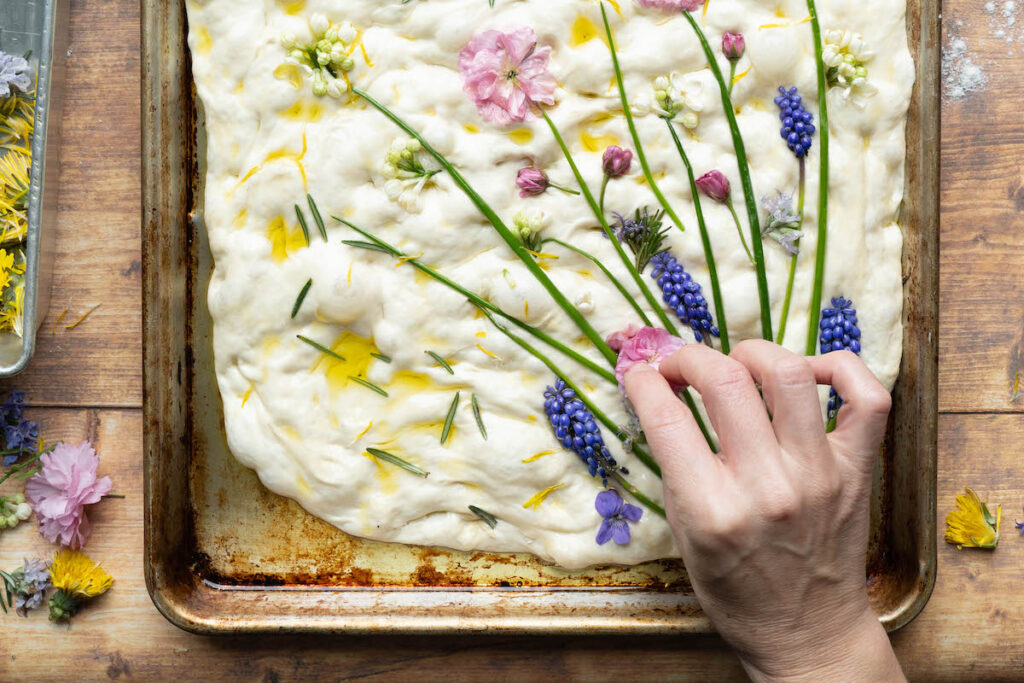
The design on this bread is completely up to you. Use any fresh edible flowers, herbs, or even vegetables for this lovely focaccia bread. I used grape hyacinth, cherry blossoms, rosemary leaves & blossoms, and lilacs for this because they were what I had growing in the garden at the time. Small veggies like cherry tomatoes and thinly sliced red onion and peppers work great. Use what you have on hand and let your creativity shine!
Size & Shape:
You can make this sourdough focaccia on a standard baking sheet or in a 13×9 inch pan. The sheet pan will yield a thinner result that is chewy and super crispy on the top and bottom. A 13×9 inch pan will create a bread that is a bit thicker.
Flour Choice:
I used a combination of bread flour and all purpose flour for this bread because I like the chewy texture bread flour provides but wanted a little more tenderness from the all purpose flour. You can also make this bread with all bread flour, but you may need to adjust your water ratio slightly.
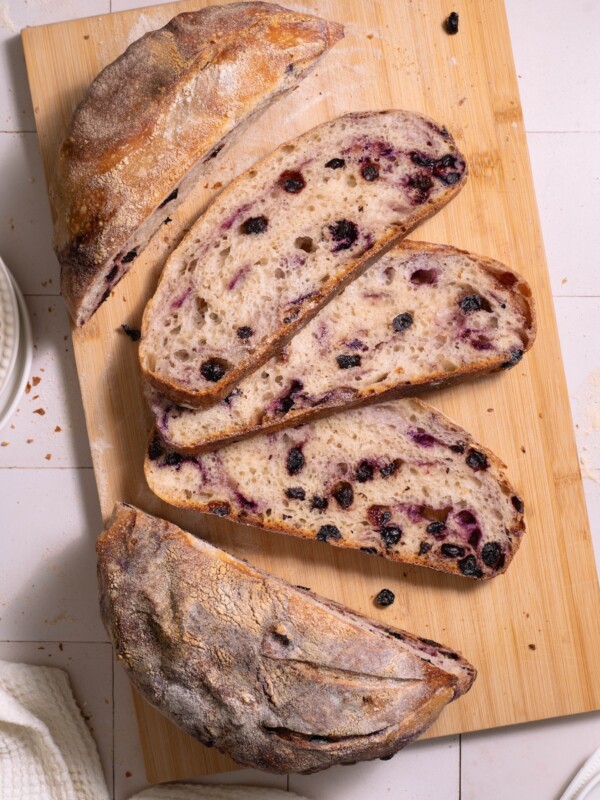
Love baking bread? Try my Herb & Garlic Sourdough or Rosemary Sea Salt Sourdough!
Sourdough Focaccia with Edible Flowers
Equipment
- Rimmed sheet pan or 13×9 inch pan
Ingredients
Sourdough Focaccia Bread
- 75 grams active, bubbly sourdough starter
- 2 teaspoons sugar
- 360 grams water
- 400 grams bread flour
- 100 grams all purpose flour
- 10 grams sea salt
- 3 tablespoons olive oil, for coating
Optional Toppings
- Edible flowers
- Herbs
- Coarse sea salt flakes
Instructions
The night before:
- In a large bowl, whisk together sourdough starter, water, and sugar. Add flour and salt, mixing to form a rough mass.
- Allow dough to rest about 30 minutes, then shape it into a round ball. Place in a well oiled bowl, flipping to coat the dough with oil on all sides. Cover with oiled plastic wrap and leave to rest overnight at room temperature, about 12 or more hours, until dough has at least doubled.
The next morning:
- Check to see that your dough has at least doubled. If not, give it more time to rise.
- Oil a rimmed baking sheet with the olive oil, spreading with your fingers or a pastry brush to cover the entire surface. Alternatively, you can also use a 13×9 inch pan for this (you'll get a slightly thicker final bread).
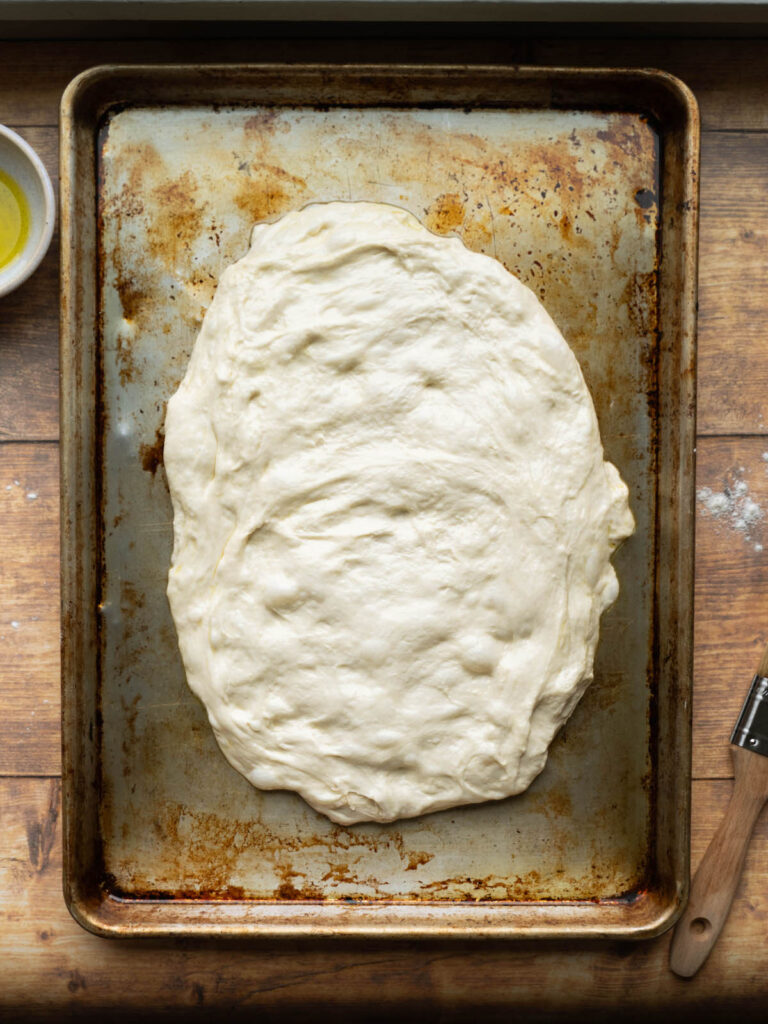
- Remove dough from bowl with oiled hands and place on baking sheet, flipping to coat with olive oil. Use your fingers to gently stretch and flatten the dough just a little bit. You don't want to stretch it to fit the pan at this point – just let it rest for now.
- Cover with an inverted sheet pan or well-oiled plastic wrap and let the dough rest at least 2 hours, or until doubled and bubbly. This may take a few hours depending on your sourdough starter and your room temperature. Your dough probably still won't fill the whole pan – don't worry about that!
- Preheat oven to 425° F.
- Use the fingers of both your hands to dimple the dough (as if you're planning the piano), pressing your fingers all the way to the sheet pan. Dimple entire surface of dough, stretching very gently as you go.
- Arrange your edible flowers and herbs however you like. Press them into the dough as your decorate so they don't pop out as the bread rises in the oven!
- Use a pastry brush to coat all your toppings with olive oil and brush a bit more onto the entire surface of the bread. Sprinkle with coarse sea salt, if desired.
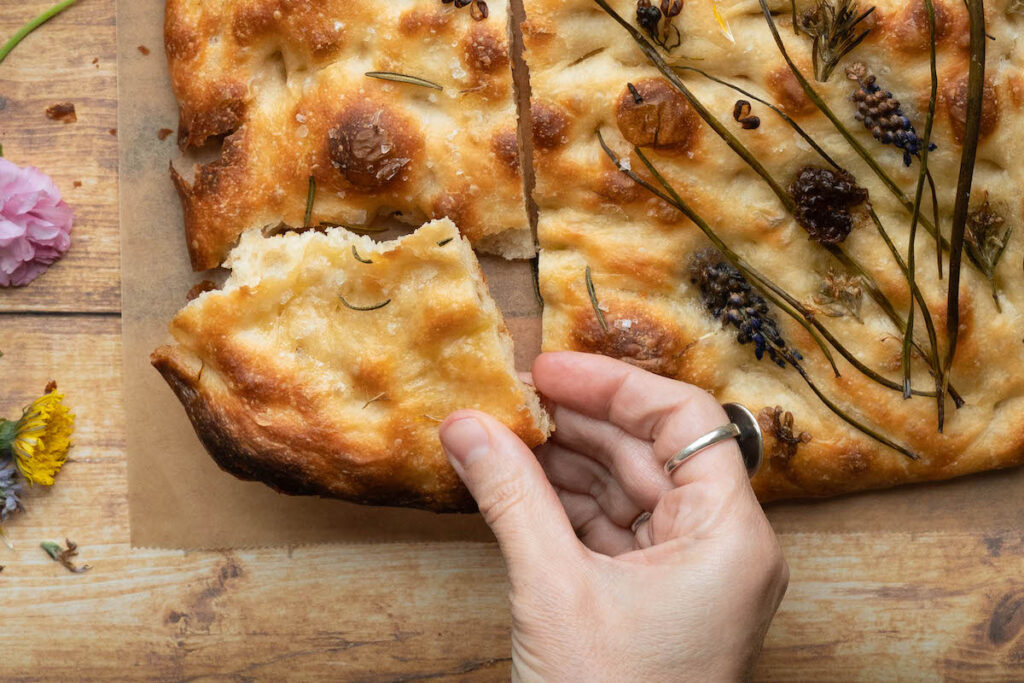
- Bake for 25-30 minutes, until bread is golden brown on the top and bottom. Allow to cool before slicing and eating.
Did you try this recipe?
Be sure to leave a comment below!