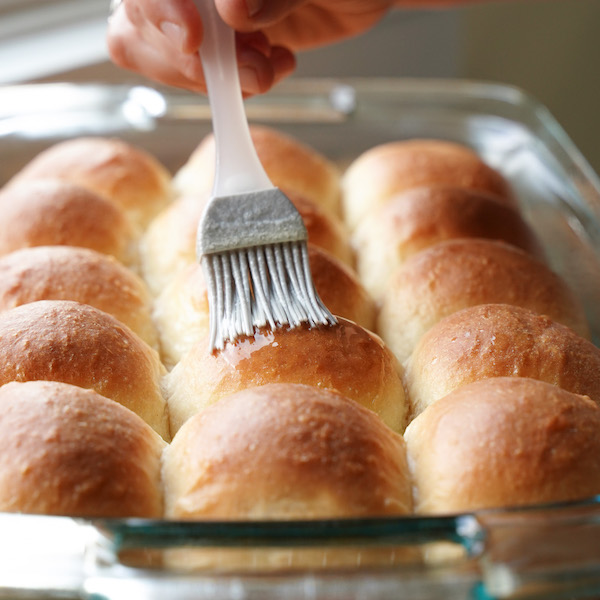
Perfectly soft and chewy buttermilk rolls, made from scratch and on the dinner table in about an hour and a half… need I say more?
If you’ve ever been intimidated by homemade bread, this is the recipe to try. These buttermilk rolls are low-effort, high-reward, and utterly irresistible. They’ll make you feel like a bread-baking queen, and once you’ve made them once, you’ll want to make them again and again.
If you’re craving comfort food (or just something really, really good to go with dinner), bake a batch of these delicious buttermilk rolls!
Recipe highlights
- Quick & easy. Homemade bread in under 2 hours, start to finish (yes, really!).
- Extra buttery. Melted butter in the dough and brushed on top for ultimate butter flavor.
- Soft & chewy. The perfect texture that you crave in homemade rolls.
- Beginner-friendly. I’ve simplified this recipe to make it as straightforward as possible. Let the yeast and your stand mixer do most of the work.
- Versatile. These rolls are great for breakfast, lunch, snacking, dinner… they do it all.
How to make homemade buttermilk rolls
Here’s a quick overview on how to make these rolls. For full instructions and ingredient measurements, scroll down to the recipe card.
- Warm the buttermilk. Heat gently with the melted butter just until lukewarm (not hot!). This helps wake up the yeast.
- Mix the dough. Stir together warm buttermilk, melted butter, egg, sugar, salt, yeast and flour to form a shaggy dough.
- Knead. Knead in a stand mixer until the dough is smooth and pulls away from the sides of the bowl (8-10 minutes).
- First rise. Let the dough rise in a warm spot until puffy and doubled (30-40 minutes).
- Shape rolls. Divide the dough into 15 equal pieces, shape into balls, and place them in a buttered baking dish.
- Second rise. Let the rolls rise again while the oven preheats (about 30 minutes).
- Bake. Bake until golden brown, then brush generously with melted butter.
That’s it! In less time than it takes to watch a movie, you’ll have a warm tray of fresh, buttery buttermilk rolls that are impossibly soft inside.
Tips for success
Use warm (not hot) buttermilk. Aim for about 100–110°F. If it’s too hot, it can kill the yeast and cause the buttermilk to separate. If it’s too cold, the dough may rise slowly.
Let your dough rise somewhere warm. Yeast loves warmth. If your kitchen is chilly, set the dough near a sunny window, in a just-turned-off oven, or even on top of your fridge.
Don’t over-flour the dough. It should be slightly tacky without sticking to your hands. Too much flour will make the rolls dry instead of soft and pillowy.
Butter generously. Melted butter brushed on top after baking gives these rolls their delicious fresh-from-the-bakery flavor. Don’t be shy with your butter here – it’s what makes them buttery buttermilk rolls, after all.
Let them cool (a little). Tempting as it is to tear in right away, giving them 20 minutes to rest after baking helps the structure of the bread set properly.
Substitutions & variations
These rolls are endlessly adaptable. Here are a few ways to customize them:
🧄 Garlic & Herb Rolls
Add 1 clove of minced garlic and 2 tablespoons of chopped fresh herbs (like rosemary, chives, or thyme) to the melted butter when making the dough. Brush the tops with garlic butter after baking for maximum flavor.
🧀 Cheesy Rolls
Fold ½ to ¾ cup of shredded cheddar, parmesan, or gruyère into the dough before shaping. Top with a little extra cheese for a golden, bubbly finish.
🍯 Slightly Sweet Rolls
Add an extra tablespoon of sugar to the dough and brush the rolls with honey butter after baking for soft, slightly sweet rolls.
🐄 No buttermilk? No worries!
Make your own “buttermilk” by stirring 1 tablespoon of lemon juice or white vinegar into 1 cup of milk. Let it sit for 5–10 minutes before using.
Serving suggestions
These are truly all-purpose rolls. Here are a few ways to enjoy them:
- Serve warm with soups and stews
- Use for mini sandwiches, breakfast sandos, or sliders
- Tear them apart and dip into olive oil + balsamic or your favorite spread (pesto, hummus, etc.)
- Slather with butter and jam
- Serve them as a side at dinner
They’re also perfect for the holidays: think Thanksgiving, Christmas, or Easter dinner.
Storage & reheating
Store leftovers in an airtight container at room temperature for 2–3 days.
Reheat in a medium oven until warm (350°F for 5–10 minutes).
Freeze baked rolls on a tray, then wrap individual rolls in plastic wrap and transfer to a freezer bag. Let thaw at room temperature.
More delicious homemade bread recipes:
- Garlic Herb Sourdough (No-Knead)
- Raspberry Brie Focaccia
- Nettle Pesto Swirl Bread
- Rosemary Sea Salt Sourdough (No-Knead)
If you made these Soft & Buttery Buttermilk Rolls, please leave a star rating and comment below. I’d love to hear what you think or answer any questions. Thank you!
Soft & Buttery Buttermilk Rolls
Equipment
- 13×9 inch baking dish
Ingredients
- 1 cup buttermilk
- 4 ounces unsalted butter, melted
- 1 egg
- 3 tablespoons sugar
- 1 teaspoon salt
- 2 1/4 teaspoon instant yeast, (1 package)
- 3 1/2 – 4 cups all purpose flour
- 2-3 tablespoons extra melted butter for glazing , (optional)
Instructions
- Generously butter a 13 x 9 inch pan. Set aside.
- Melt butter in a small saucepan. Add buttermilk, stir to combine, and continue to heat on low until just warmed (95 – 110°F). Turn off heat.
- Add egg, sugar, salt, and yeast to a stand mixer fitted with a dough hook. Add buttermilk mixture and stir to combine.
- Add 3 1/2 cups of flour and mix on low until combined. Turn mixer to medium speed and knead until dough is smooth and pulls away from the sides of the bowl, about 8-10 minutes. Dough should be soft and pliable and slightly sticky without sticking to your hands.
- Cover the bowl with a clean towel or plastic wrap and set aside in a warm place to rise until doubled, about 30 – 40 minutes.
- Remove dough from bowl and divide into 15 pieces (I use a kitchen scale to weight them out to the same amount but you can just eyeball it). Roll each piece into a tight ball and place, evenly spaced, into the prepared 13 x 9 inch pan.
- Cover lightly with a clean moist kitchen towel or plastic wrap and allow to rise again, about 30 minutes.
- When rolls are almost ready to bake, preheat oven to 375° F. Bake rolls for 16 – 20 minutes or until golden on top and baked through.
- Immediately brush with extra melted butter. Allow to cool at least 20 minutes before serving.
Did you try this recipe?
Be sure to leave a comment below!