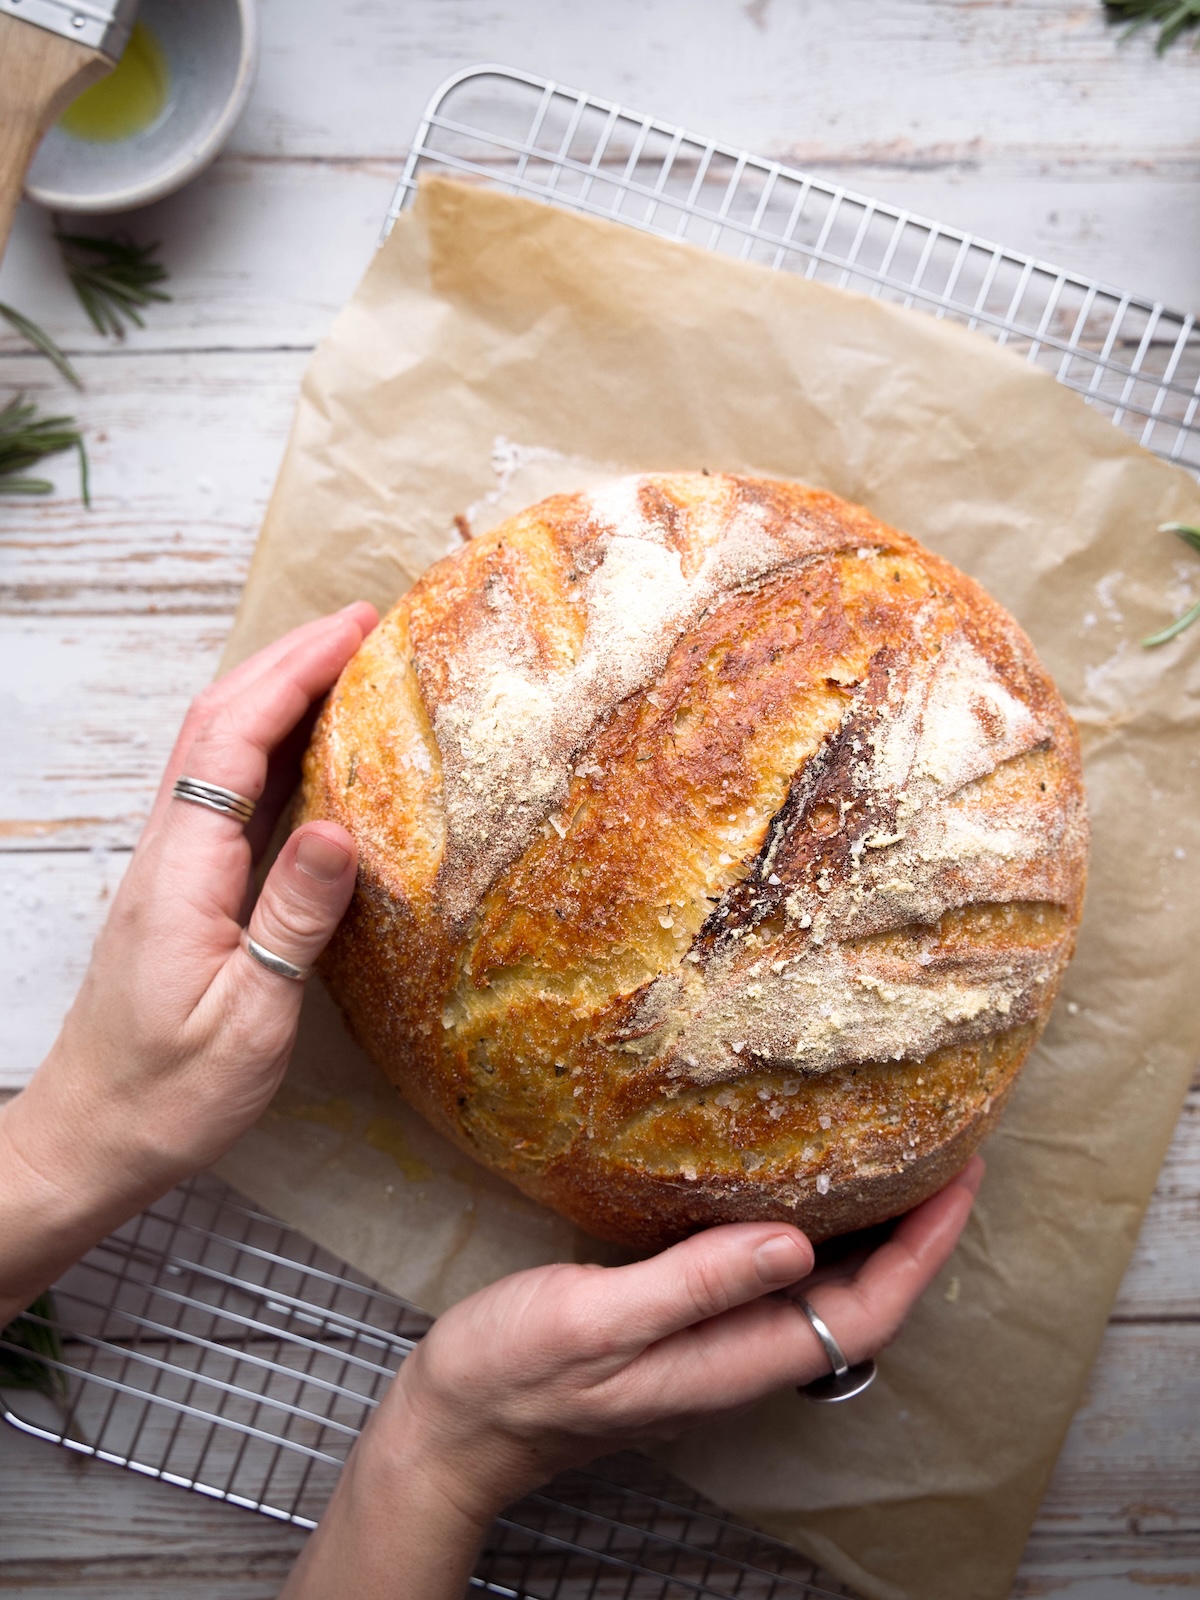
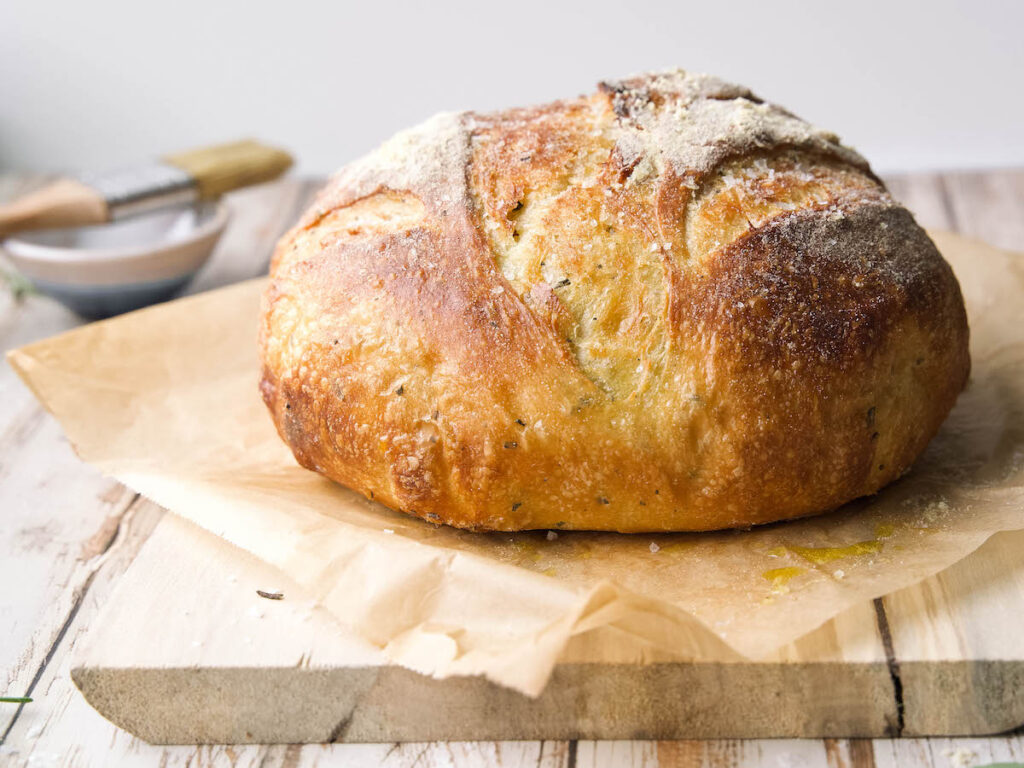
This rosemary sourdough bread is herby, chewy, tangy, and topped with sea salt and olive oil. It’s an easy sourdough loaf that relies on stretch & folds instead of kneading and gets most of its work done during a slow overnight fermentation.
This is my very favorite sourdough bread recipe, with fresh rosemary, crunchy sea salt flakes, and that beautiful sourdough flavor and texture. It’s everything I want in a loaf of bread.
Table of Contents
- Why you’ll love this bread
- Recipe overview
- Tools & equipment needed
- How to make rosemary sea salt sourdough
- Alternative baking schedules
- How to prepare rosemary for bread
- Pro sourdough tips
- Variations
- Rosemary sourdough troubleshooting & FAQ
- Serving suggestions
- Storing & reheating sourdough bread
- More savory sourdough recipes:
- Rosemary Sea Salt Sourdough Recipe
Why you’ll love this bread
- Amazingly flavorful. It’s herby. It’s salty. It’s brushed all over with olive oil. With that signature sourdough tang and fresh rosemary, this bread is full of bold, aromatic flavor.
- Beginner-friendly sourdough. No machines and no kneading necessary. This rosemary sourdough bread uses simple stretch-and-folds and an overnight rest for great structure with minimal hands-on time.
- Flexible schedule. I’ve included a rough baker’s timeline with options for overnight or same-day proofing, so you can make this loaf work for your schedule.
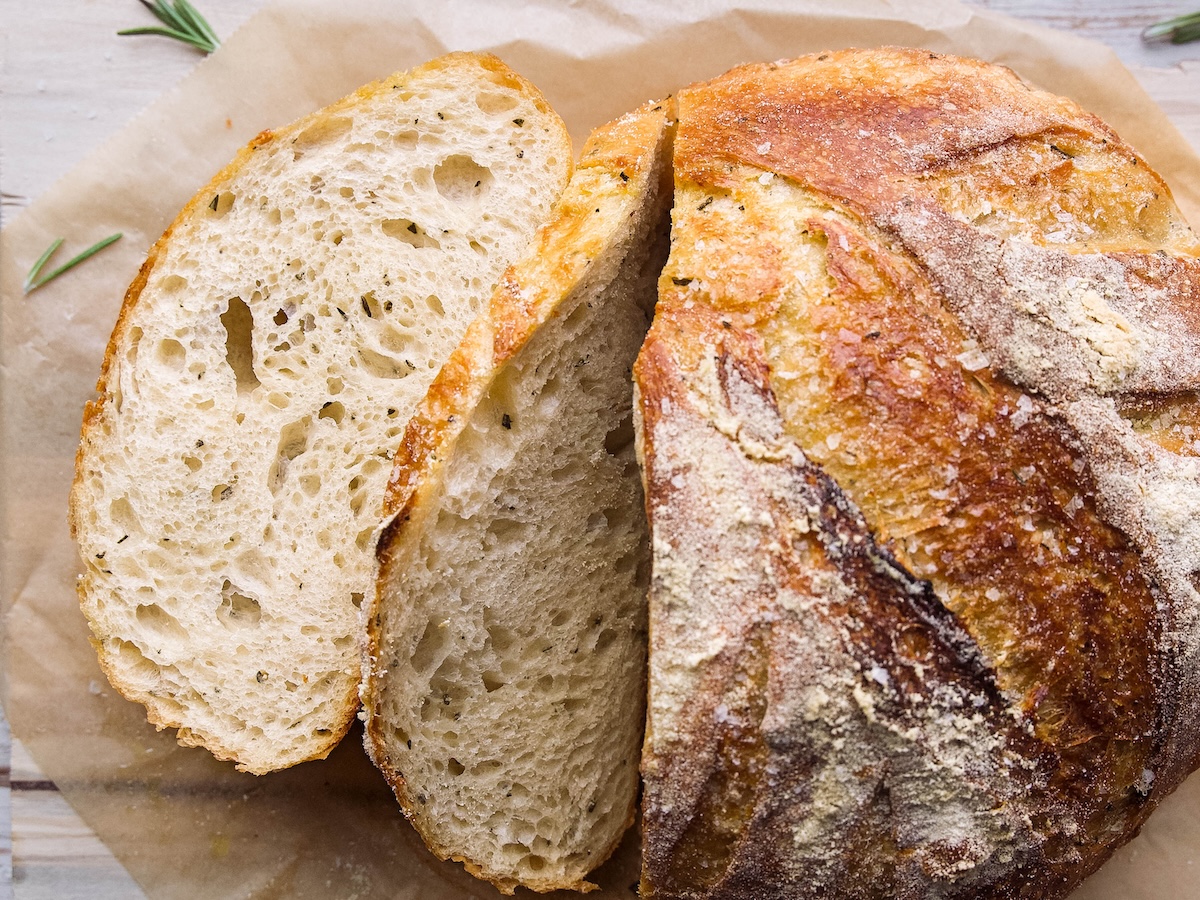
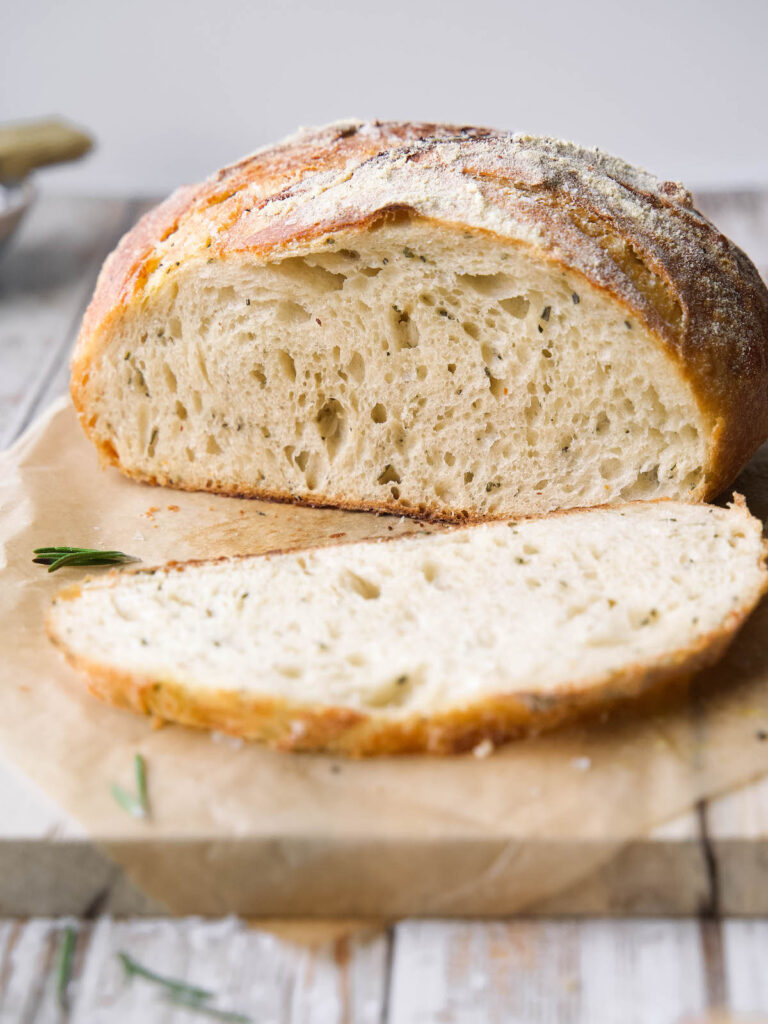
- Crusty outside, chewy inside. Baked in a hot Dutch oven for a deeply golden, perfectly crunchy crust and soft, open crumb.
- Well-tested & forgiving. Make it how you want – use the timeline, equipment, and shaping techniques that suit you best.
Recipe overview
Prep: 10 min (active time)
Bulk Ferment: ~4 hr (room temp) + overnight in refrigerator
Final Proof: 1-2 hr (depends on your starter & kitchen temp)
Bake: 45–55 min
⏱️ Total: 12–14 hr (mostly hands-off)
🥖 Yield: 1 loaf/boule
💪 Skill level: Intermediate
😋 Flavor Profile: Savory, aromatic rosemary with a golden crust and chewy interior, enhanced by olive oil and crunchy sea salt. Pairs well with: olive oil, soups, soft cheeses, sandwiches, charcuterie boards, fresh tomato slices, dips.
If you love savory sourdough recipes, be sure to check out my Garlic Herb Sourdough, Roasted Garlic Parmesan Sourdough, and Sourdough Caprese Focaccia.
Tools & equipment needed
To be honest, you really don’t need anything special to make an amazing rosemary sourdough loaf. There are certainly a few pieces of equipment that will make this easier, but all you really need is a large mixing bowl and a baking sheet.
I recommend you have these tools:
- 5-6 quart Dutch oven with lid (optional but helpful)
- Bread lame or very sharp knife for scoring
- Mixing bowls
- Kitchen towel and/or plastic wrap
- Kitchen thermometer (optional but recommended)
How to make rosemary sea salt sourdough
I highly recommend you give yourself 2 days to make this bread. I like to feed my starter and mix my dough on day one and then shape & bake the next day. The overnight rest in the refrigerator adds structure and flavor to the final bread.
You can find full instructions & the ingredients list in the recipe card at the bottom of this post.
Here’s a quick overview for making your rosemary sourdough bread:
Day before baking
- Feed starter. Make sure it’s active and doubled by early evening.
- Mix dough. Combine ingredients and start bulk fermentation.
- Stretch & fold. Perform 4 sets about 30–45 min apart.
- Refrigerate overnight. Place the dough in the fridge after bulk ferment.
Baking day (morning/afternoon)
- Shape. Remove dough from refrigerator and shape into a boule.
- Final proof. Rest at room temperature 1-2 hours, until puffy.
- Preheat oven & bake. Score bread & bake (covered at first, then uncovered).
- Brush with olive oil & sprinkle with sea salt while warm.
Step-by-step instructions:
1. Mix the dough
- In a large bowl, whisk together sourdough starter, warm water, olive oil, and rosemary salt (rosemary + sea salt).
- Add bread flour and mix with a spatula or your hand until a rough, shaggy dough forms.
Cover and rest for 30-45 minutes (autolyse).
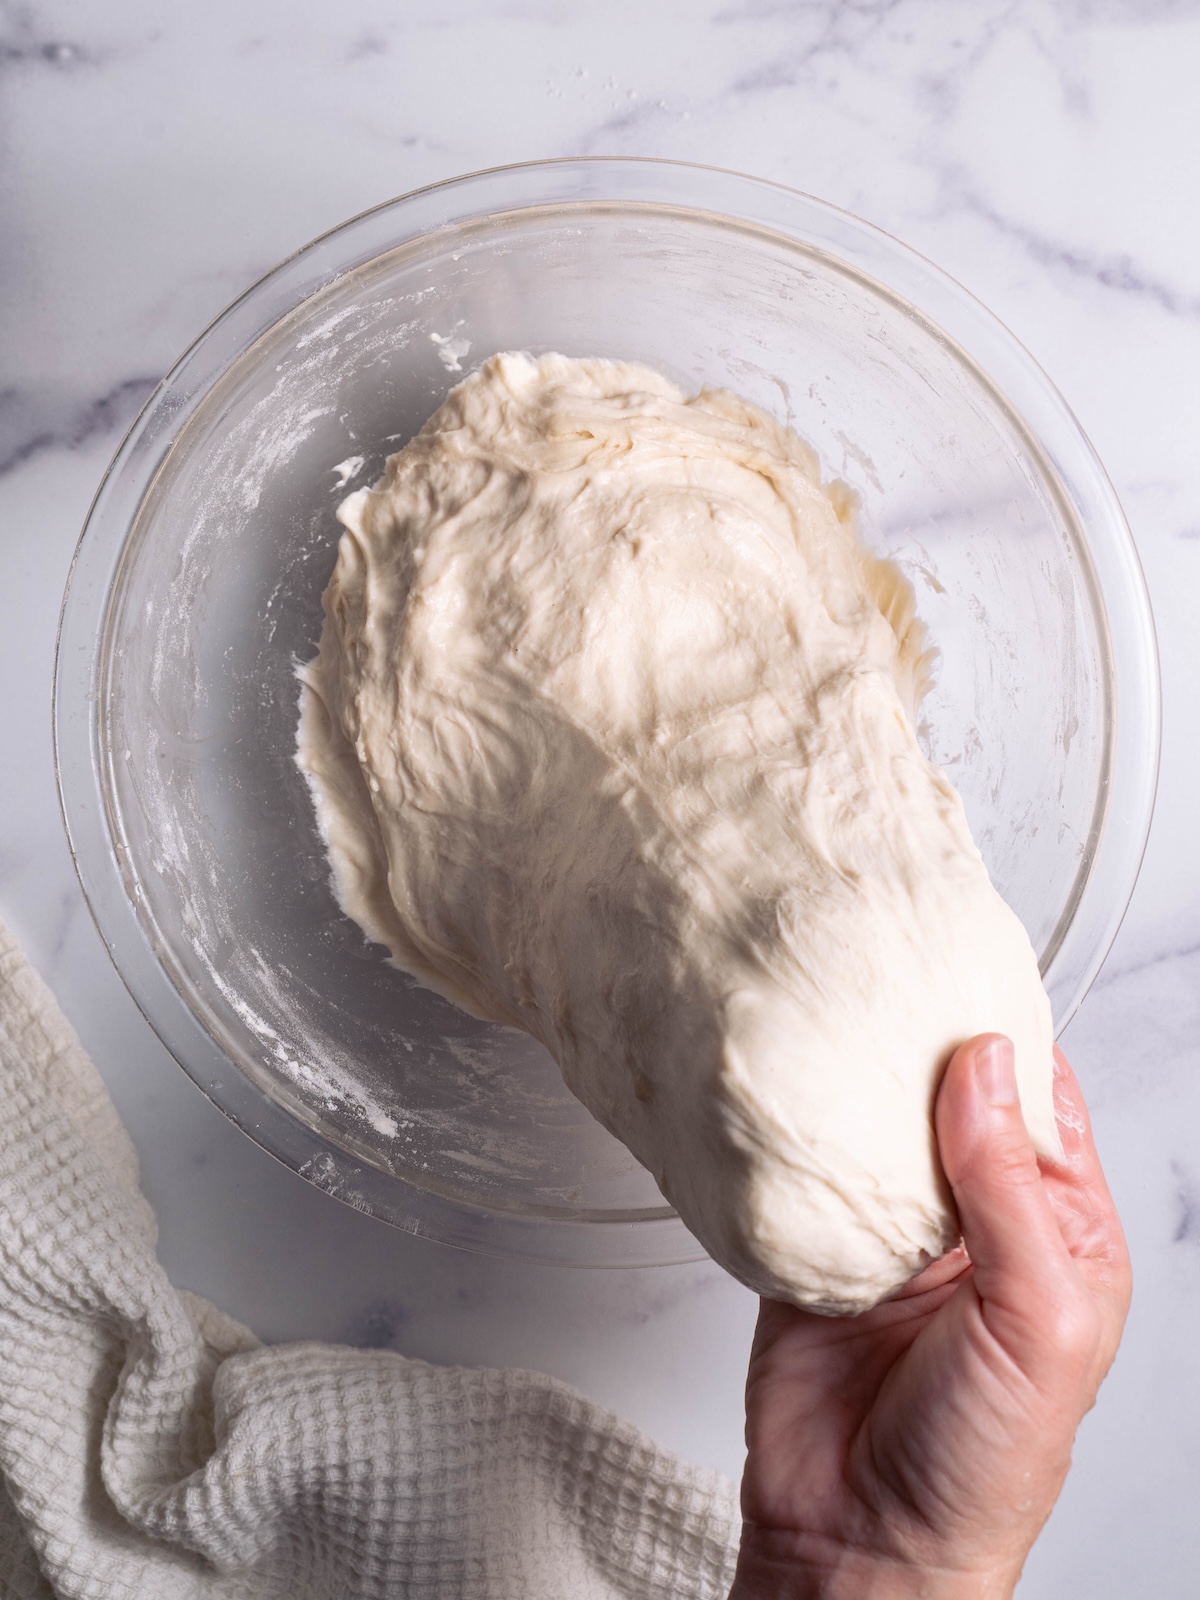
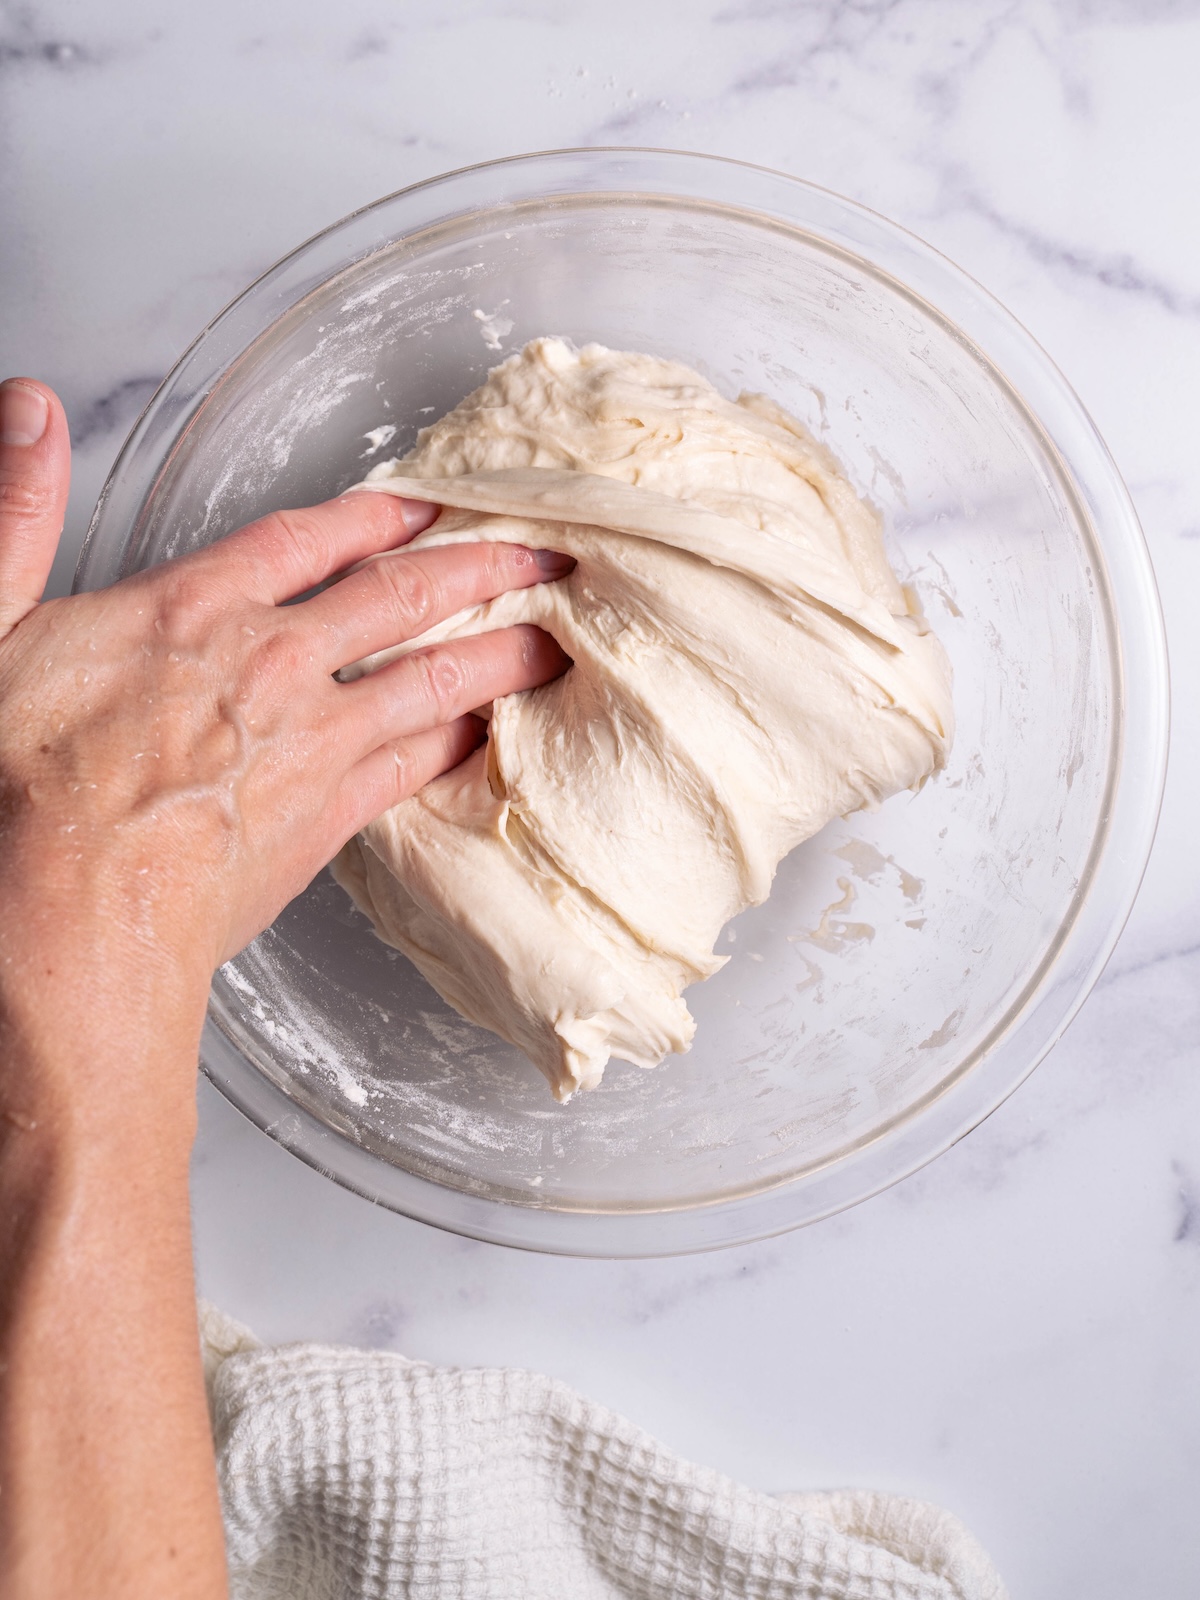
2. Stretch & fold (bulk ferment)
Over the next 2–4 hours, perform stretch & fold cycles every 30–45 minutes until you’ve done about 4 sets and the bread has good tension. To stretch & fold:
To stretch the dough, pull the dough from one side and give it a nice long stretch, then fold it back to the middle. Turn the bowl a quarter turn, stretch again and fold back to the middle. Repeat on all four sides, cover the dough back up, and allow it to rest again until the next stretch & fold.
3. Cold fermentation
After your final stretch & fold, cover the dough and refrigerate overnight. This slow chill develops flavor and makes shaping easier.
4. Shape & final proof
- Pull the dough from the fridge, shape into a boule, and place seam-side up in a floured bowl or banneton.
- Cover and proof 1-2 hours until puffy and nearly doubled (depends on ambient temp and starter activity).
5. Bake!
- Preheat your oven to 450° F, placing your Dutch oven with lid to preheat as well.
- Turn proofed dough out onto parchment, score deeply with a lame/knife, and place into the hot Dutch oven.
- Bake covered 25 min, then uncovered 18–25 min until crust is golden and internal temp hits 205–215°F.
- Brush with olive oil and sprinkle with coarse salt once out of the oven.
- Let the bread cool at least 1 hour before cutting — this finishes the crumb and prevents gummy texture.
Alternative baking schedules
Shape on day 1: Some bakers like to shape their bread before the overnight rest in the refrigerator. This is fine, too! Shape your bread into a boule after the stretch-and-folds, let it bulk ferment at room temperature until puffy, and place it in the fridge for the night. In the morning, you can score it and bake it straight from the fridge – no need for additional proofing time at room temp.
Same day bake: If your schedule doesn’t allow overnight rest, you can also shape and proof the same day. You’ll need to start much earlier, and might need to feed your starter the night before so it’s ready to use in the morning.
Example schedule for same day bake:
Night before, 8:00 PM — feed starter.
Day of, 8:00 AM — mix flour, water, starter, rosemary salt. Rest 30 min.
8:30 AM — bulk ferment (70°F): 3–4 hr with 4 sets of folds at 45-min intervals.
12:30 PM(ish) – Shape and final proof, 1–2 hr at room temp.
Bake: 450°F in Dutch oven; 25 min covered, 18–25 min uncovered.
Example schedule for overnight sourdough:
Day 1, 8:00 AM — feed starter. Keep warm, 68° – 75° F.
12:00-2:00 PM — when starter is doubled and bubbly, mix with flour, water, and rosemary salt. Rest 30 min.
Afternoon into evening — bulk ferment (70° ish F): 3–4 hr with 4 sets of folds at 45-min intervals.
Overnight ferment — rest in refrigerator overnight (shaped or unshaped).
Day 2 — shape & proof 1-2 hours, or bake from cold if already shaped. Bake at 450°F in Dutch oven; 25 min covered, 18–25 min uncovered.
How to prepare rosemary for bread
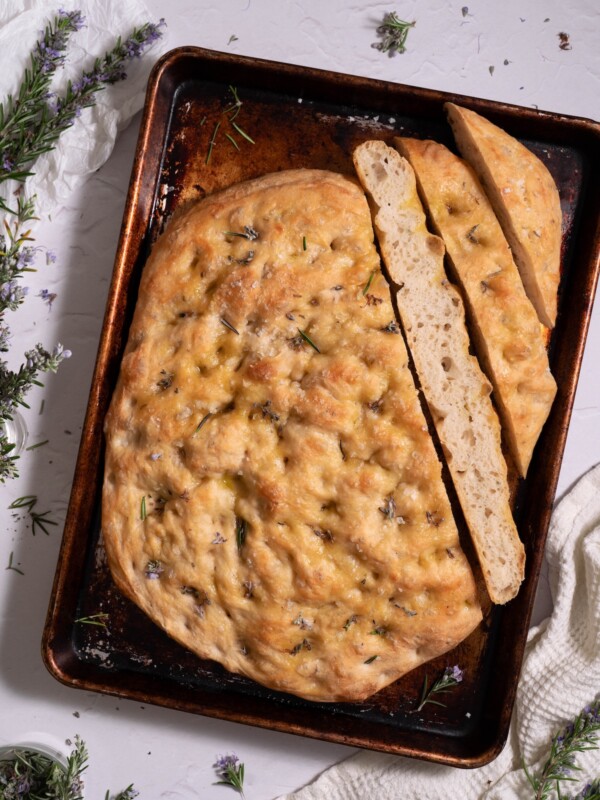
To get the most fresh rosemary flavor in this sourdough, I like to start by making a rosemary salt. Chop up some fresh rosemary and mix it with a blend of both fine and coarse sea salt.
Finely chopped rosemary will disperse more evenly throughout the dough, and the salt will help pull out the essential oils as well as prevent the rosemary from clumping.
Pro sourdough tips
There are a few tips to keep in mind in order to make the best sourdough possible.
Know when your dough is done proofing. If in doubt, use the “finder dent test”. Once your dough has rested the appropriate amount of time (a few hours for this recipe), gently press a floured fingertip into the dough. Properly proofed dough will spring back slightly but still maintain somewhat of a dent. Dough that isn’t ready yet will spring back immediately, and dough that is over proofed will never fill back in.
Score your bread. Scoring bread isn’t just about making a pretty pattern – it’s an important step. Scoring sourdough allows it to expand properly in the oven. Without scoring, the crust can trap steam, causing the bread to burst unpredictably. The cuts control how the bread opens up, creating a better shape and texture while also making it look beautiful! Use a bread lame or a very sharp knife for this.
Use an instant-read thermometer. It’s not always easy to tell when your bread is fully baked, but using a thermometer ensures it’s done perfectly. Aim to get your bread out of the oven when its internal temperature is between 205° and 215° F.
Don’t slice the bread too soon. I know it’s tempting to immediately tear into your freshly baked sourdough, but practice patience here. If you slice into it too early, you could end up with a gummy texture! The bread should rest for at least an hour before you slice it.
💡Need to master sourdough before making this rosemary version? Check out my Basic Sourdough Bread recipe.
Variations
Herbs: Substitute some of the rosemary with thyme or sage.
Other add-ins: Stir in chopped olives or parmesan during the stretch & folds.
For a garlic rosemary loaf: Add roasted garlic for extra savory depth. See my Roasted Garlic Parmesan Sourdough recipe for ideas.
Pump up the rosemary flavor: Warm 2 Tbsp olive oil with a few rosemary sprigs over low heat for 2–3 minutes, strain, then brush on the loaf after baking for even more herby flavor.
Rosemary sourdough troubleshooting & FAQ
Either the bread was underbaked, cut too early, or didn’t proof long enough. Use an instant-read thermometer to help you decide when the bread is fully baked, and wait for it to cool fully before slicing.
Yes, you’ll want to use about half the amount if using dried. However, I do highly recommend you use fresh rosemary, as the flavor just doesn’t really compare.
Yes! A banneton will give a nicer shape, but a bowl lined with a floured tea towel works great too for anyone who doesn’t have a banneton.
Keep in mind that sourdough doesn’t actually need to double like most yeast breads do. Aim for an increase of 30-50%. The dough should be puffy, lighter, and slightly jiggly, and you should see some air bubbles, but it should still hold its tension.
I recommend doing the “finger dent test” to see if your sourdough is properly proofed: gently press the dough with a floured finger. If the indentation springs back slowly but stays slightly indented, it’s ready. If it springs back fully, it needs more proofing; if it doesn’t spring back at all, it may be over-proofed.
Serving suggestions
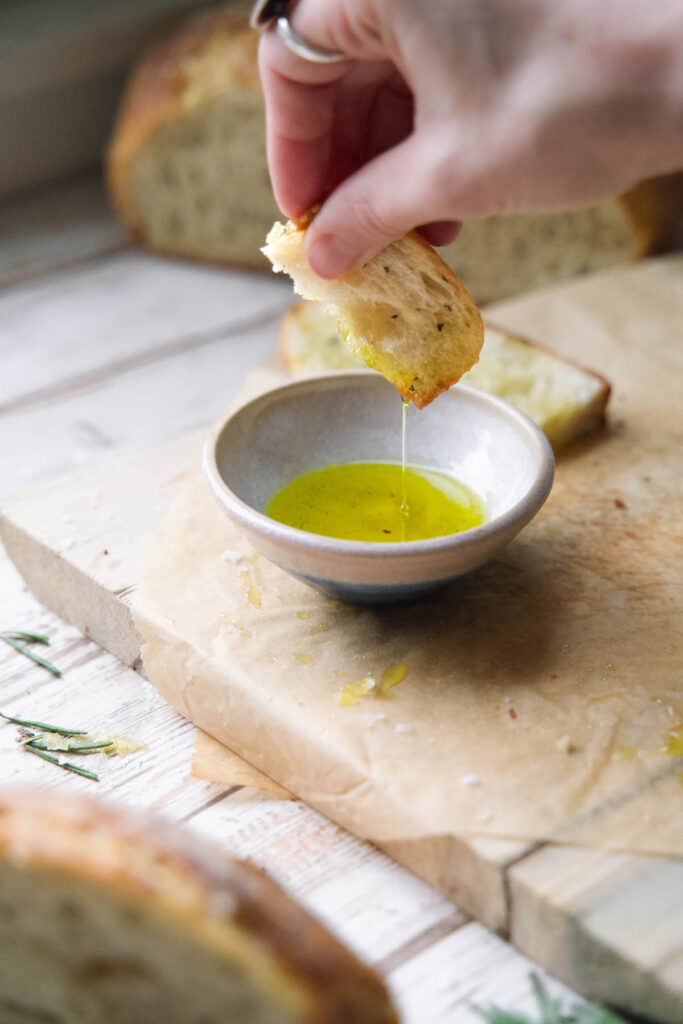
You very well may just eat this whole loaf of bread on its own, toasted with big slabs of salted butter or dipped into olive oil. And that would be totally fine. However, this rosemary sea salt sourdough is super versatile. Try it:
- As a vehicle for mopping up pasta sauce
- Smeared with thick slabs of butter and flaky salt
- Dipped into high-quality olive oil + balsamic
- As a base for avocado toast (next level!)
- Alongside soups like tomato basil or butternut squash
- Made into sandwiches with goat cheese and roasted veggies
- For BLTs and breakfast sandwiches
Storing & reheating sourdough bread
Store at room temp: Store in a paper bag or bread box for up to 5 days.
Freezing: Wrap whole or sliced loaf airtight; freeze for up to 3 months.
Reheating: For slices, toast in a hot oven, broiler, or toaster. For whole loaves, warm in a 350°F oven 10–15 minutes to crisp the crust.
More savory sourdough recipes:
- Jalapeño Cheddar Sourdough
- Roasted Garlic Parmesan Sourdough
- Sourdough Scones with Bacon & Cheddar
- Garlic Herb Sourdough
If you make this Rosemary Sourdough Bread, please leave a star rating and comment below. I’d love to hear what you think or answer any questions. Thank you!

Rosemary Sea Salt Sourdough
Equipment
- Dutch oven with lid optional but recommended
Ingredients
- 2 tablespoons fresh rosemary, chopped fine
- 8 grams fine sea salt
- 3 grams Maldon flakes or other high-quality coarse sea salt
- 150 grams active, bubbly sourdough starter
- 310 grams warm water
- 25 grams high-quality olive oil
- 500 grams bread flour
- Extra olive oil and coarse sea salt, for after baking
Instructions
To make the rosemary sourdough:
- Mix 2 tbsp chopped rosemary with 8 g fine salt & 3 g coarse sea salt. Combine 150 g sourdough starter, 310 g water, and 25 g olive oil with the rosemary salt. Whisk to combine.
- Stir 500 g bread flour into starter mixture.
- Finish mixing by hand, folding mixture until it forms a rough ball. Cover with plastic wrap or a damp towel and let rest 30-45 minutes.
- Over the next few hours, give the dough a stretch & fold about every 45 minutes or so. Plan to stretch & fold four total times.To stretch the dough, pull dough from one side and give it a long stretch, folding the dough back to the middle. Turn the bowl a quarter turn, stretch again and fold back to the middle. Repeat on all four sides, cover dough back up, and allow to rest again until the next stretch & fold.
- Once you've completed all the stretches, put the dough in the refrigerator and allow it to sit overnight.
The next day:
- The next morning, remove your dough from the fridge. Line a large bowl with a tea towel and dust it lightly with flour (or use a banneton). Shape your dough into a ball, pinching the bottom together to create a seam. Place dough, seam side up, into the towel-lined bowl.
- Cover with a kitchen towel or plastic wrap. Allow dough to rest and rise for about 1-3 hours, or until puffy and doubled (the time will vary quite a bit depending on your dough and the temperature in your house).
- Place a dutch oven with lid in the oven and preheat oven to 450° F. When oven comes to temperature, carefully turn your dough onto a piece of parchment, seam side down. Score the dough with a bread lame or very sharp knife in any desired pattern.
- Lift the parchment paper with your sourdough and lower it into the hot dutch oven. Cut away any excess parchment paper, put the lid back on, and bake covered for 25 minutes.
- Remove lid from dutch oven and continue to bake uncovered for another 18-25 minutes, or until bread is golden and cooked through. The best way to tell if bread is done is to take its temperature with an instant-read thermometer – it should be between 205 – 215° F.
- Remove from oven and gently lift bread out of dutch oven, using the parchment paper as handles. Allow to cool for 5-10 minutes, then brush liberally with more high-quality olive oil and sprinkle all over with coarse sea salt.
- Allow the sourdough loaf to cool completely before slicing – if you slice into it too early, you could end up with a gummy texture! It should rest for at least an hour before you slice it.
Did you try this recipe?
Be sure to leave a comment below!

We have been wanting to recreate a wonderful bread we had on vacation!! This was perfect!! True to the story, we could have eaten it all with evoo dipping. Great with pasta meals, vegetable soup, and breakfast sandwiches!! Will be making it again this winter soon!!
Kittie, thanks for taking the time to come back and leave a review. I’m so thrilled that you loved the rosemary bread!
I’m planning to freeze the loaf. Should I still brush olive oil and salt after baking or do it when it’s thawed ? Thanks 😊
Hi Sue, I’d still recommend brushing the loaf after baking, as it’s nice to do when the bread is still warm. This way, the olive oil soaks in a bit and the salt adheres nicely.
in your recipe you say to put the dough into a bowl lined with a tea towel. can i put it into a banneton instead or will that not give enough space to double in size? thank you for sharing this recipe can’t wait to try it
Hi Sophia, absolutely! I mention a bowl as an option for people who don’t own a banneton, but that will work perfectly. Excited for you to try this recipe!
ok thank you! i am a beginner so wasn’t sure. doing my stretch and folds now. the dough smells amazing
Is there a reason why I should not use my Pullman loaf pan?
Hi Gary, I think this bread would be stunning made in a Pullman loaf pan! I haven’t tried it myself, so I’m not 100% sure if the loaf pan is the right size, but please let me know if you try this!
In the process of making your recipe. Just did the initial mix. Your instructions say not to shape until tomorrow after it’s been in the refrigerator overnight. Can I shape it today and then refrigerate overnight?
Yes, you can absolutely shape it the day before instead, then pull it out of the refrigerator the next day and let it rise. I’d love to hear what you ended up doing and how your bread turned out!
After mixing and doing stretch and folds, let my dough bulk ferment and I shaped it the same day. Baked it the following day without leaving it out to rise again. Everyone loved it! Will make again.
Yay! I’m so happy you loved it!
I followed this recipe but my dough didnt double in the rise step after the fridge overnight. My house is about 70 degrees and I measured ingredients in in grams. I used Teeea Delyssa single origin cold pressed organic extra virgin olive oil. I used fresh rosemary clippings finely chopped. I make other recipes without olive oil and the bread rises fine so im curious if olive oil is weighing it down? Or what i may have done wrong?
Hi Jamie, this small amount of olive oil shouldn’t cause an issue with the dough rising. Often when dough doesn’t rise enough, it’s because of a weak starter or a starter that wasn’t ready, over- or under-proofing, or not building enough strength in the stretch and fold process. Every loaf is different and sometimes they just turn out better than others!
I am making several different loaves and wonder if doing the bulk rise first and then shape and cold proof would work with this one. That’s how I do my other loaves and it would be easier to do them all with the same method.
Absolutely! I highly encourage you to use the ratio of ingredients in this recipe, but adjust the process of fermentation as it works for your schedule and how you like to make bread. Let me know how it goes!
Love this bread!
It’s my favorite!
How long do you leave the dough out from the time you first make the dough to putting it in the fridge?
Usually between 2-3 hours, with 4 sets of stretch & folds every 30 minutes or so. I’m not super particular about the amount of time in between each stretch & fold!